Author Archives: GCSDev

Bird Feeding Basics

Winter is the perfect time to think about attracting bird visitors to your yard. Bird watching is a great hobby that can be enjoyed by both younger and older members of the family and getting started is both easy and inexpensive.

Bird Feeders

The type of bird feeders you select will depend on where you want to observe your feathered friends, as well as the kinds of foods you are offering and the types of birds you want to attract.

Hanging feeders, suitable for smaller birds, can be hung from a tree, pole or hook. Platform feeders can be mounted on a pole/post, deck railing or fence, or even just set on the ground. There are also window feeders that can be mounted directly to a window for enjoyment close at hand plus suet feeders or cages which hold suet cakes – a must for attracting insect-eating woodpeckers and nuthatches.

Feeders should be located in a sheltered place where they are not exposed to strong winds or vulnerable to attack from predators such as hawks and cats. Try grouping several different feeders together to attract the maximum number of different birds. All feeders should be kept clean and in good repair.

Bird Seeds

Just like us, birds have certain food preferences. Black oil sunflower seed is one of the most popular seeds, attracting a large variety of different birds. Some seeds such as Nyjer (thistle) are very specific – if you want to attract colorful goldfinches, then this one is for you. Mixes containing sunflower, thistle, cracked corn, millet and other seeds are also available, to tempt many bird visitors. Larger birds that feed on the ground, such as doves, quail and wild turkeys, will love cracked corn.

Natural Food Sources

If you are serious about attracting birds to your yard throughout the year, then think about planting trees, shrubs, perennials and even annuals that will provide natural foods at different times. Birds love berry-producers such as crabapples, and viburnums. Perennial favorites for seed eaters include members of the black-eyed susan family (Rudbeckia), coneflowers (Echinacea), goldenrod (Solidago) and coreopsis. Seed heads of ornamental grasses are also highly sought after. Of the annuals, sunflower (of course!), marigolds and cosmos are popular. Just be sure to leave seed heads on the plants so birds can take advantage of them.

Don’t Forget Water!

Water for bathing and drinking is one of the basic requirements for all birds, even for species that won’t visit feeders. If you already have a bird bath, be sure to keep it filled with clear, fresh water. A bird bath heater will keep water available even during freezing weather. A mister, dripper or bubbler will move the water around and attract even more birds with sparkling splashes.

From feeders and seeds to plants and water sources, we have everything you need to get started attracting birds. Come on in today and you’ll be able to enjoy your feathered friends this fall and winter!


Growing Plants Under Artificial Lights

When growing plants indoors it is often difficult to provide the proper amount of light required to maintain a happy and healthy specimen. With the onset of winter, the days are shorter and the nights are longer limiting the amount of available natural sunlight even further. The intensity of the sun is also diminished at this time of year. The addition of artificial lighting to replace or supplement natural sunlight is important for growing healthy, attractive houseplants and necessary to keep flowering plants in bloom during the winter months.

 Light Color and Plant Growth

In order for a plant to grow properly the light it receives must mimic natural sunlight. Sunlight contains all the colors of the spectrum and all are necessary for the process of photosynthesis. Red and blue are two of the most important colors vital to plant growth. Red stimulates vegetative growth and flowering, however, too much red will create a leggy, stretched plant. Blue regulates plant growth for a fuller, stockier plant. For the best results, choose a full-spectrum fluorescent gro-bulb. This is the best lighting choice for optimum houseplant health and vitality.

 Light Intensity

Different types of plants require different light intensities. Some plants thrive in low light, others require bright light. With artificial lighting the intensity of light is determined by the bulb wattage and how close the plant is to the light source. Knowing the light requirements of your plants will benefit you greatly when determining where to place a light and which plants to group together under the fixture. As a general rule of thumb, plants that are grown for fruit and flower usually require more light than those grown strictly for their foliage. Plants under artificial light should be rotated weekly, as light from tube style bulbs is more intense in the center of the bulb than at the ends. Using white trays, mirrors or trays lined with foil will help reflect light to increase the amount of light available to your plants.

 Duration of Light

Most houseplants do well with 12-16 hours of artificial fluorescent light each day. Too little light will result in elongated, spindly growth and too much light will cause a plant to wilt, color to fade, soil to become excessively dry and foliage to burn. Plants also require a rest period each day. Providing your plants with an 8-12 hour period of darkness a day will moderate plant growth rate and provide the rest necessary for setting flower buds. For example, the Christmas cactus needs 13 hours of uninterrupted darkness a day, for six weeks, in order to set flower buds. Without this required time of rest time the Christmas cactus will not flower. The use of an automatic timer is helpful in regulating the amount of time your houseplants are exposed to light and darkness.

Fixtures

When choosing a plant light fixture, the most important feature is that the fixture be adjustable. You should be able to adjust the fixture up and down to account for the growth height and varied light intensity requirements of a variety of plants. If the fixture is not adjustable you will limit the type of plants that you can grow and how much you can use the fixture. Simple shop lights and tabletop light fixtures are both adjustable and good choices for lighting houseplants. Another consideration is the size of the fixture. Size choice is based on the number of plants that you plan to grow under the light. Lighted plant carts provide multi levels of lighted shelves on which to grow plants. Carts are on wheels that make them easy to relocate, while tabletop fixtures are lightweight and easily transported to other locations when necessary.

It may seem intimidating to get started with artificial light sources, but you will be amazed at the difference it will make to all your indoor plants, houseplants and seedlings alike.

Nephrolepis fern leaf isolated on white

artificial-3

Three pots

Tools for Holiday Gift Giving

It’s easy to shop for gifts for the gardeners on our holiday list. There are always new tools available for the serious, and not so serious, gardeners in our lives. In fact, there may be too many to pick from, but we can help you narrow down the selection to find the perfect gift.

  • Pruners
    Every gardener faces the need to prune or deadhead flowers at some time. From hand pruning a wayward twig to removing a branch 10′ overhead, there is a pruning tool to make any job easier. Because everyone’s hands and hand strengths are different (and some folks are left-handed), hand pruners are the most personal of garden tools. Hand pruners come in two basic styles: by-pass pruners have two sharp blades that pass each other when cutting, while anvil pruners have one sharp blade cutting the material against the other flat blade. Several models accommodate different pruning needs, sizes of hands, hand strengths and orientations. New ergonomic models optimize hand strength and minimize discomfort. Another option is a pruning saw, which is different from any old saw. A larger sheath model saw makes short work of removing a large branch. A smaller fold-up model is great to have in a gardener’s pocket while making the daily rounds. Different models, with different lengths and teeth sizes, ease sawing effort. Check out our gift shop to see all the options. When an overhead branch requires removal, a gardener appreciates a pole pruner. Not only is it a hassle to get out the ladder, it’s dangerous to perform the sawing and pruning motions when balancing.
  • Shovels and Spades
    Shovels and spades are other key gardening tools. While many shovel versions exist, the round point shovel is the most common. The heavy-duty blade point pushes through the soil and the rounded blade scoops the soil. Square-edged shovels also scoop soil and other materials in addition to digging but don’t have the point. Spades, basically a smaller version of a shovel, are usually flatter. Most shovels have a rolled lip, or rim, on the top of the blade. This is where the user puts their foot to push the tool into the soil. The larger the rim, the more comfortable for the foot when doing a lot of digging. Better quality shovels and spades are powder coated to prevent rust, are pre-sharpened, and the blade is welded or forged to the shaft. Shafts vary in style and material. Wood, plastic or fiberglass shafts may be straight or end with a handle. A fiberglass shaft lasts longer than wooden shafts and doesn’t require annual maintenance and cleaning. Ergonomic designs reduce the chance of wrist injury. Other shovel/spade specialties include the trenching shovels to dig deeper than the standard 12 inches, border spades and smaller sized round point shovels to dig smaller holes or working around existing landscape. And don’t forget trowels and other hand digging tools. If your gardener has a special digging or scooping need, there’s a shovel or spade for it.
  • Hoes
    Hoes may seem old-fashioned, but there are new designs every gardener can appreciate. Used since ancient times, the hoe performs many functions in the garden depending upon its configuration. The regular hoe’s rectangular shaped blade, positioned at a right angle to the shaft, weeds and shallowly cultivates. The V-shaped version, also called the Warren hoe, has a point to dig furrows for seed planting. The other side closes the furrows after planting. The “weeding” and “action” style hoes make short work of removing weeds
  • Rakes
    A rake is another essential tool. Think of a leaf rake as a large hand – it allows the user to gather a large amount of material such as leaves and debris. Rakes may be metal or plastic, quite large to cover a large area quickly or quite small to get under plants without damage. Rakes are practical and save time and energy. Specialized rakes include the two styles of garden rakes, flat and bow, and thatch rakes to remove thatch from lawns to keep turf lush and thick.

There’s just one problem with giving these larger tools as gifts – they’re very difficult to wrap!

Fresh Cut Trees

There’s nothing quite like a fresh, vibrant Christmas tree with its bold branches, crisp scent and natural charm. But which tree is right for your holiday décor? There are several popular tree species that can be ideal decorations.

  • Douglas Fir This tree holds its dark green needles for a good while, making it an excellent choice for those who prefer to decorate their tree early or like to enjoy their tree into the new year. The soft branches and needles emit a faint lemon scent when rubbed. Douglas Firs have an airy open shape, great for lots of ornaments, garlands and lights. They are also native to the Idaho area!
  • Fraser Fir This pine is an aristocrat among Christmas trees with its short grey-green needles and majestic shape. Typically, this tree stays fresh the longest with long needle retention, ideal for longer periods indoors. The branches have a more open shape, great for displaying stunning ornaments. Fraser firs have a delicate evergreen fragrance.
  • Alpine Fir If you want a tall tree, or a tree that doesn’t take up too much space, Alpine firs are for you. Native to Idaho, they are not densely branched but are strong for ornaments and have long lasting needles.
  • Noble Fir Noble fir trees are another beloved holiday tree species, featuring deep blue-green needles and cones that showcase trademark spikey bracts. Noble Firs are very densely branches and have a full appearance. The branches are very strong and are perfect for heavy ornaments.
  • Grand Fir The grand fir tree has a glossy dark green color with needles that are one to two inches long. Its needles and branches are soft to the touch and not particularly firm, making it a better decorative tree than one draped with heavier ornaments.
  • Nordman Fir An excellent needle retaining species with soft glossy dark green needles. It has symmetrical silhouette which makes is an ideal pyramidal shape. However it does not have a strong scent and has a wide footprint that makes it not ideal for smaller rooms.
  • Lodgepole Pine Native to Idaho, they have a long, yellow-green needles. Excellent needle retention and fresh pine scent. Branches point upwards and some trees can come with pine cones still on them.

When Your Fresh Cut Tree Isn’t So Fresh

When Christmas is over and your tree starts to droop, you have many options to keep it useful. First, you can easily recycle your tree; many parks and towns sponsor tree recycling programs in January. If you prefer to use your tree at home, the boughs make perfect mulch for perennials and the trunk can also be chipped for mulch. Chunks of the trunk can even be made into simple bird feeders or similar garden crafts, or you can use the whole tree as an impromptu brush pile to provide protection and shelter for winter wildlife. You might even consider decorating your tree again using cranberry and popcorn strings, small birdseed ornaments and chunks of fruit to create a bird feeding station.

Fresh cut trees are amazing holiday traditions for many families, and there is a perfect tree type to suit your decorating preferences to make amazing holiday memories.

The Benefits of Plants in the Workplace

Time spent in nature is well known to provide many physical, mental and emotional benefits, but what if your work schedule and career keep you in an office without many opportunities for heading outdoors? You can bring the outdoors in and reap many of the same benefits.

Plants Can Improve Your Workplace

There has been extensive research done regarding the benefits of plants in the workplace. With full time employees spending approximately one-quarter of their lives at work it is important that these buildings provide an environment of beauty, health and comfort. Studies confirm that there are both physiological and psychological benefits to surrounding yourself with nature at work. An eight-month study conducted by a Texas A&M University research team has concluded that plants significantly reduce workplace stress and enhance employee productivity, a win-win situation for both employer and employee. Other studies have verified those findings, as well as expanded the list of benefits plants can provide when used judiciously as part of an indoor workplace.

The presence of plants in the workplace can…

  • Lower blood pressure
  • Reduce stress
  • Increase humidity
  • Reduce illness
  • Purify air
  • Reduce dust
  • Lower energy costs
  • Quicken employee response time
  • Enhance problem solving ability
  • Spark creativity
  • Increase brain activity
  • Provide a positive outlook
  • Act as a mood elevator
  • Have a calming affect
  • Boost learning
  • Contribute to noise reduction
  • Improve office appearance
  • Reduce distractions

With so many obvious benefits just by including plants in office décor, every office – whether it is a large corporation, a simple business or a cozy home office – should include at least a few plants.

Bringing Plants to Work

There are many easy ways to blend plants into office décor. Popular ways to integrate plants into the office include…

  • Larger potted plants or containers in a greeting or reception area.
  • Ferns or hanging pots in broad windows.
  • A ficus tree or other large pot near a water cooler.
  • Pothos or other trailing plants on top of cabinets in a break area.
  • Small plants and flowers on individual desks.
  • Decorating for holidays with seasonal plants.
  • Giving office plants as gifts for work anniversaries, welcomes, etc.

When choosing plants for the office, be sure to opt for plants that will function best in the environment. Take into consideration temperatures, light levels and humidity so the plants will thrive. Selecting low-maintenance plants that can withstand good-natured neglect is also wise, so they will still thrive even when project deadlines, committee meetings and vacation days may make their care sporadic. Fortunately, there are many great plants that can liven up an office, and each one will bring great benefits to the workplace.

All About Amaryllis

A bold, flowering bulb, amaryllis is popular for its winter blooming habit and makes a colorful indoor plant as well as a great gift for anyone with a green thumb. But how much do you really know about these familiar flowers?

What Is Amaryllis?

These plants are part of the flowering bulb genus Hippeastrum, which is native to South America, Central America, Mexico and the Caribbean in tropical and subtropical regions. It must be noted that the familiar amaryllis can easily be confused with the genus Amaryllis, which is actually native to southern Africa and is most successful only when grown outdoors. Hippeastrum flowers, on the other hand, thrive indoors and are widely sold as gifts and houseplants in the winter months.

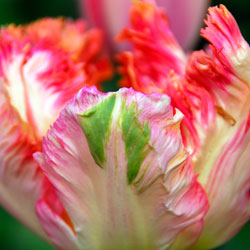
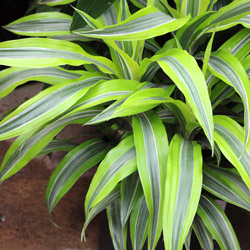
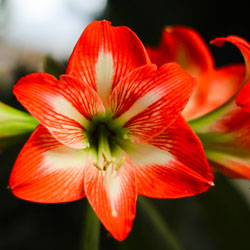
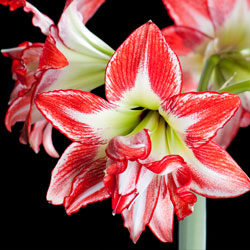
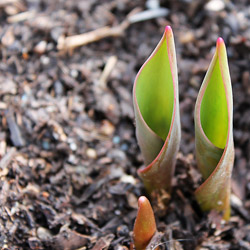
Hippeastrum bulbs range from 2-5 inches in diameter and are relatively fleshy. Each bulb will produce several spear-like, stiff leaves that can reach 12-20 inches long. Along with the foliage, each bulb can produce 1-2 long stems that will yield 2-12 trumpet-shaped flowers with large, triangular petals. The bloom colors range from white, red, orange, salmon, pink and peach to deeper hues of burgundy and purple. Variegated and striped blooms are also popular.

Blooms may last for several weeks, and the foliage can persist long after the blooms die.

Potting and Caring for Amaryllis

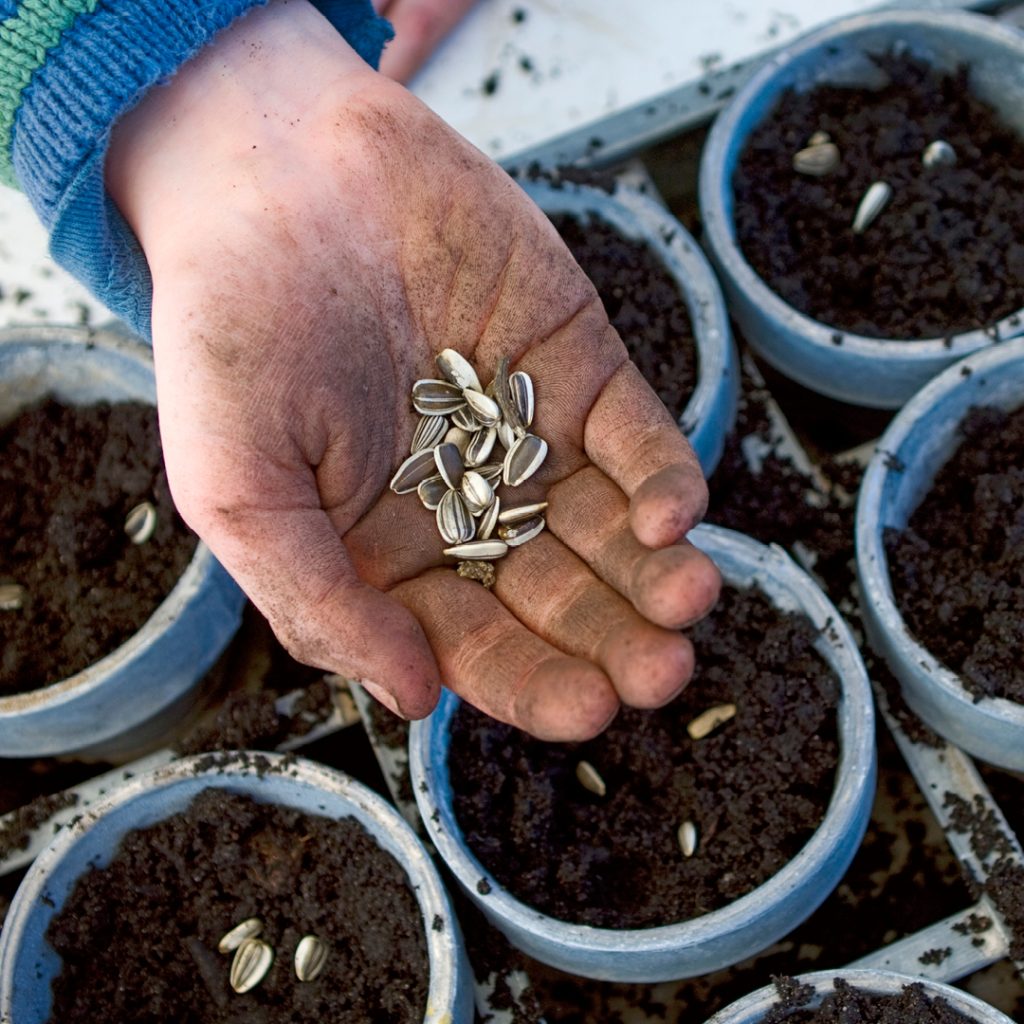
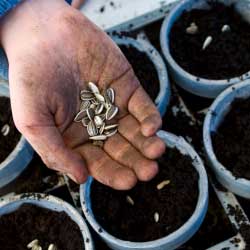
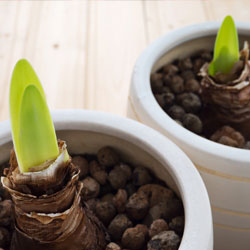
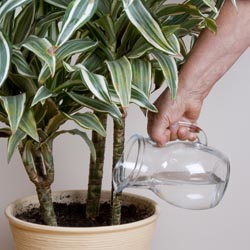
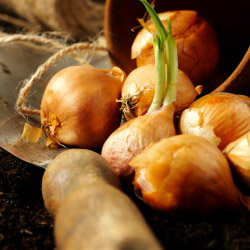
Unpotted, dormant bulbs should be stored in a cool (55 degrees Fahrenheit), dark, dry location. Before planting, the bulbs should be brought to room temperature, and the roots can be lightly rehydrated in lukewarm water for an hour or two before planting, but the base of the bulb itself should be kept dry to minimize the risk of rot. While these bulbs will bloom in water – they’re often sold in clear, decorative vases with the roots reaching into water and pebbles used as a planting medium – they will do better when properly planted, which will also encourage reblooming.

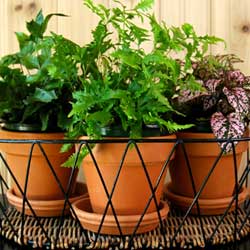
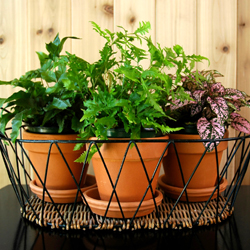
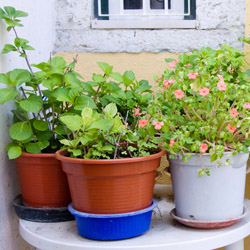
The best pot for a single amaryllis bulb will be just an inch wider than the bulb’s diameter, or several bulbs can be planted together in a larger pot for a more dramatic display. Because these flowers grow so tall, however, the pot should be heavy enough to support their size. If necessary, adding several rocks or a layer of gravel to the bottom of the pot before planting will help balance the weight to keep the arrangement stable, and a deeper pot will also provide adequate room for root growth. It may also be necessary to add a stake to support the tall flower stems, but be sure not to damage the bulb when adding a stake to the pot.

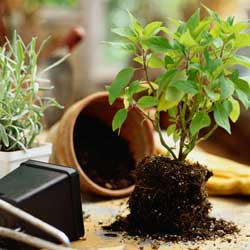
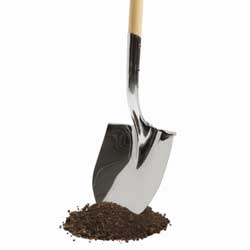
Rich potting soil is essential for the best amaryllis blooms, as these bulbs grow vigorously and require adequate nutrition to reach their full potential. When planting a bulb, it should be submerged in the soil up to its neck, but leaving the top quarter of the bulb uncovered. The soil should be tamped firmly to support the bulb. Place the pot in a warm, sunny spot when foliage emerges, and rotate the pot daily as the plant grows taller to ensure straight, upright growth that will better support heavy flowers.

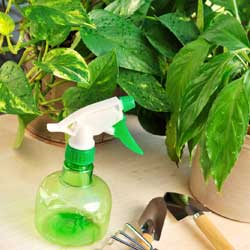
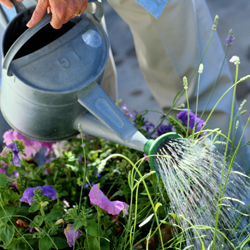
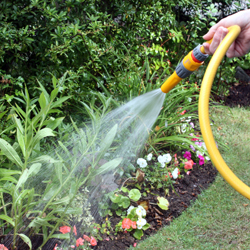
Gently water the bulb until the first stems appear, but take care not to overwater the pot or the bulb and roots may rot. As the plant grows taller and the blooms emerge, more watering will be needed to keep it adequately moisturized.

It may take 7-12 weeks for an amaryllis to bloom, depending on the type and size of bulb, its growing conditions and the care it receives. Larger bulbs that produce more flowers will generally take longer to bloom, while smaller bulbs will have shorter flowers but will bloom more quickly.

After the Bloom

Because these plants are popular every holiday season, many people discard amaryllis bulbs after they have stopped blooming. It is possible, however, to encourage reblooming with the proper care.

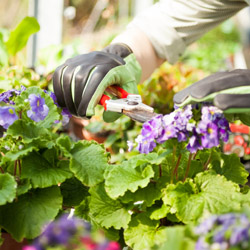
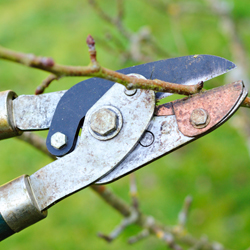
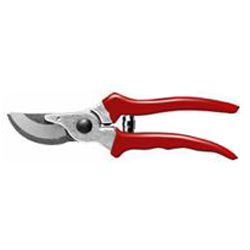
After the flowers have faded, deadhead the blooms but leave the foliage intact. Sharp flower-pruning shears are best to avoid tearing the stem or causing it to bend or break. Your Amaryllis should be placed in the sunniest spot available, continue to water as necessary and monthly feeding should ensue. This will encourage leaf production which with photosynthesize adding nourishment to the bulb enabling it to produce flowers again next winter. Move the plant outside once all danger of frost has passed to a sunny location. Continue to water and begin fertilizing every other week.

If you want to control when your amaryllis blooms again, you will need to encourage the bulb to go dormant. This is done by stopping fertilization, allowing the soil to gradually dry out, and reducing sunlight and temperature so leaf production slows and eventually stops. The dormant period will generally last 8-10 weeks, so, if you would like your Amaryllis to bloom for Christmas, mid-August is the time to begin this process. When leaves brown naturally, cut them back, remove the bulb from the dry soil, wrap it in newspaper and store it at around 55 degrees Fahrenheit for 8 to 10 weeks. After this dormant period, repot the bulb in fresh soil and begin watering again. The bulb will start to produce leaves and flowers won’t be far behind. With the proper conditions and care, you can keep your amaryllis blooming for years to come.

Amaryllis flowers are attractive and bold, perfect for brightening any indoor landscape during a cold and dreary winter. By understanding these flowers and their needs, you can provide them with proper care to ensure they always look their best.

Winter Houseplant Care

With programmable thermostats, double-paned windows, and other tricks, we are able to keep our homes at the same climatic comfort level year-round. Indoor houseplants, however, can be sensitive to subtle seasonal changes. Even in a balanced home environment, proper winter houseplant care is essential to help plants thrive through this challenging season.

Winter Changes in Home Climates

While the winter changes in our homes are more subtle than the harsh freezes and deep snowfall outdoors, our home environments actually change more than we may realize. Depending on the conditions we like to maintain and the climate outdoors, winter changes may include…

  • Fewer hours of daylight, and the daylight that does exist is less intense than during the summer.
  • Lower temperatures often accompanied by chilly drafts from windows and doors.
  • Lower humidity levels, particularly if central heat has been running, which can dry out air.

These conditions are less than ideal for many houseplants, particularly tropical species that are adapted to longer hours of sunlight, higher temperatures, and richer humidity. Fortunately, with some extra care, winter houseplants can adapt and thrive even during the harshest winter months.

Adjusting Winter Houseplant Care

There are several steps you can take to adjust your houseplant care during the winter. Easy and effective steps include…

  • Reducing Watering – Many houseplants go dormant in the winter, and while their growth is slowed, they require much less water. Overwatering in winter can lead to root rot and other plant damage, so avoid watering houseplants excessively in the winter months. When you do water your houseplants, use room-temperature water to avoid shocking the plants’ roots.
  • Reducing Feeding – Similar to reducing the water a plant receives while dormant, reducing fertilizer is a good step to care for winter houseplants. Plants do not need as much nutrition when their growth is slowed and reducing plant food until spring will keep the plants from developing leggy or spindly growth.
  • Improving Humidity – Using a humidifier is a great way to provide better humidity for winter houseplants. Other options include clustering plants together so they can share the humidity from their own respiration, as well as positioning plants in a bathroom where humidity is naturally higher. Misting frequently can also help improve humidity, as can using a pebble tray underneath the plants, so long as the pots are not resting in water.
  • Relocating Plants – Moving winter houseplants to south or west-facing windows where they will get more light can help them thrive in winter. Take care that the plants’ foliage does not brush window glass, however, or the plants may get chilled or frosted.
  • Supplementing Light – In darker rooms or when dreary winter days seem endless, adding supplemental lights near houseplants can help them flourish. Choose the appropriate bulb size and strength for your plants’ needs. Other steps to increase natural light include opening draperies and washing windows so more light reaches each plant.
  • Dusting Plants – Houseplants easily acquire a layer of dust and debris without outdoor breezes to keep them clean. Use a soft, damp cloth to carefully wipe each plant’s foliage to remove that dusty layer or give plants a gentle shower to water and clean them at the same time. Clean plants will be able to absorb light more effectively.
  • Rotating Plants – Plants will stretch and turn their foliage in an effort to reach more sunlight, particularly in winter. To minimize this stretching and help keep plants growing straight and upright, rotate them every few days. This is easy to do for larger plants on casters or mobile plant stands.
  • Watching for Pests – Even in winter, pests can infest houseplants. Be diligent about watching for spider mites, mealy bugs, fungus gnats, and other common houseplant pests, and use insecticidal soap or neem oil spray to control the pests as soon as they appear, keeping the infestation from spreading to other plants.

Houseplants have many benefits, particularly in winter when an urban jungle can help mitigate Seasonal Affective Disorder and alleviate the depression and anxiety that often accompanies dreary winter days. By following proper winter houseplant care, you can keep all your plants happy and thriving even during more challenging months, just when you need their inspiration and a connection to nature the most.

Preserving the Harvest

Was it a bumper crop this year? Do you have tasty fruits, vegetables and herbs overflowing your storage? Now that the harvest is in, the decision needs to be made as to what to do with the abundance.

Years ago, homes had root cellars to store winter squash and root vegetables such as onions, potatoes and carrots to keep them cool and dry for several weeks. As more homes refinish basements into living spaces and more urban gardeners expand their harvest, however, it may be difficult for gardeners to store their harvest this way. So, what can they do?

Here’s a quick little table to help:

Vegetable Store Freeze/Blanching Time Can Dry Pickle
Beets X (2 min) X X X
Broccoli (3 min) X X X
Brussels sprouts (3 min) X X X
Cabbage (90 sec for wedges) Pickle first X X
Carrots X (5 min) X X X
Cauliflower (3 min) X X X
Celery (3 min) X X
Fennel (1/2 min) Pickle first X
Horseradish X (shred) Prepare as sauce X X
Kohlrabi (3 min) Pickle first X X
Onions X (raw) Pickle first X X
Parsnips X (2 min) X X X
Potatoes X (cooked) X X X
Rutabagas X (2 min) X X X
Sweet Potatoes/Yams X (cooked) X X X
Turnip X (2 min) X X X
Winter Squash X (cooked) X X X
  • Storing: Only store mature and perfect vegetables. If there are soft spots or bruises, eat immediately or preserve. Leave several inches of stems on winter squash. It’s important to maintain temperatures between 32-40⁰ Fahrenheit with good air circulation and ventilation. To reduce spoilage, the humidity should be between 85-95 percent.
  • Freezing: Freezing maintains nutrients, flavor and texture. Most vegetables require blanching (cutting into pieces, a boiling water bath [see times above], followed by immersion into very cold water) prior to putting into freezer bags or containers in the freezer. Maintain a temperature of 0⁰ Most vegetables will store well in the freezer for up to 12 weeks.
  • Canning: Best method for vegetables with high water content such as fruits and tomatoes. Hot water baths or pressure cookers seal the contents in sterilized jars. Most vegetables are low acid foods and require using a pressure cooker. Use cleaned, fresh and tender vegetables. Follow all pressure cooker instructions carefully.
  • Drying: No special equipment required. Most people use ovens or dehydrators. It’s important to have good air circulation and all vegetables are cleaned and not bruised. Blanching in a hot water bath increases quality and cleanliness. Adding 1/4 teaspoon of citric acid to each quart of water will reduce darkening and discoloration.
  • Pickling: Used around the world to preserve foods, pickling also includes relishes and fermentation. Examples include Kim-chi, pickles, sauerkraut and chutneys. Follow all recipes carefully. Most use vinegar to stabilize acidity and prevent bacteria. Some recipes will suggest canning to preserve the product, others will recommend refrigerator or crock storage.

Have specific questions? The National Center for Home Food Preservation has many online publications to assist you.


Getting Your Trees and Shrubs Ready For Winter

Winter wind and sun are responsible for much of the injuries your landscaping plants will sustain over the winter. The elements are especially hard on evergreens such as arborvitae and boxwood. Being evergreen, these plants are constantly losing moisture through their leaves, but since the ground is frozen, the water in the soil is unavailable and they cannot replenish their supply. Drying winter winds and bright, reflecting sun only serve to compound the problem. Fortunately, there are a number of ways to prevent this.

  1. Make certain that the plants have plenty of water before the ground freezes as a plant in a water deficit situation is much more prone to winter injury. Keep watering plants until the first freeze, but water slowly so the ground is not saturated which would lead to ice heave and root damage.
  2. A heavy mulch of shredded bark or leaves, pine needles or straw can be spread around the plant to a depth of 3-5 inches. This will help preserve moisture in the soil and keep the soil warmer so delicate roots are not as easily damaged by ice and frost.
  3. To reduce the effects of the winds, wrap shrubs with burlap or other breathable fabric. This not only breaks the force of the wind, but also shades the plants from sun. Do not, however, wrap plants in plastic or tarps that would restrict air flow completely, or the plants may smother. Another option is to use Wilt-Pruf. It is sprayed on the plant to reduce the loss of moisture caused by wind and sun.
  4. Remember, younger plants, saplings and newly planted shrubs are more subject to winter damage so take special care of these. Plant as early as possible so they have more time to get established before winter sets in, and keep a close eye on them to minimize any storm damage through the season.
  5. After a heavy storm, inspect your trees and shrubs for damage. If boughs or branches have broken, prune them away immediately so they do not continue to tear and cause more injury to the plant. Use a soft broom to brush off a heavy accumulation of snow if needed, but do not try to melt away any accumulated ice or frost, as the temperature change can damage the plants.

With good preparation and conscientious care, your trees and shrubs can withstand even the cruelest of winter cold and storms, and they’ll be bursting into new spring growth before you know it.

shrubs_1trees_1

Blossom End Rot

Nothing is more disheartening than grabbing a beautiful tomato only to find the entire bottom is soft, black and rotten. Blossom end rot (BER) affects tomatoes, peppers, eggplant, squash and melons. Caused by insufficient calcium and uneven water during the rapid growth of the plant and its fruit, BER is easily avoidable with the proper precautions.

All vegetables need calcium for healthy development. When tomatoes, peppers, melons and eggplant can’t get enough, the tissues on the blossom end of the fruit break down. By testing your soil to determine its pH and calcium content, regularly watering and curbing fertilizer use, your susceptible veggies should be free of BER.

The best prevention occurs before planting. The soil pH determines the amount of calcium available to a plant. At lower pH levels, less calcium is available for the plant to absorb because it becomes chemically tied up in the soil. Most vegetables grow well in soils with a pH of 6.2-6.8. However, vegetables susceptible to BER require a pH of 6.5-6.8, where more calcium is available and it can be more easily absorbed, especially during rapid growth and fruiting periods. If the pH is lower than 6.5, the crop is likely to develop BER. This can also occur when the pH is correct, but the soil contains an insufficient amount of calcium.

Water fluctuations and excessive fertilizer also affect nutrient absorption. A plant requires water to absorb nutrients. If no water is present, no nutrients can be absorbed, and in addition to blossom end rot, plants may be small and weak as well as more susceptible to other pests, diseases and deficiencies.

Additionally, too much fertilizer can cause a plant to grow so quickly that the nutrient uptake cannot meet the demands of growth, leading to BER. In these cases, the plants grow so rapidly and develop produce so quickly that there isn’t time for the proper nutrient balance to be absorbed, including the right amount of calcium. Because of this accelerated growth and insufficient nutrition for the growth pace, plants will be more susceptible to blossom end rot.

Unfortunately, simply adding calcium to the soil will not stop BER this year, but it can help your soil become better conditioned for next year. However, we do carry several products to help with this year’s crop as well. Easy-to-use calcium sprays can save much of this year’s crop of tomatoes or other vulnerable produce. Come on in and our knowledgeable staff will help you find the best product for your situation, as well as for tips on how to improve your soil’s pH levels, calcium content, moisture retention and overall nutrition so blossom end rot is never a problem in your garden again.

end-rot-2

end-rot

Summer Watering Tips

As the days heat up, watering can become a dreaded garden chore and too many gardeners use wasteful techniques that use plenty of water but don’t give their plants the moisture they really need. Make watering plants easier and more efficient with the proper practices and tools…

  • Mulches not only make plantings look more attractive, but their most important functions are to help retain soil moisture and minimize weeds, which would also usurp moisture from your plants. Mulch around plants to a depth of 2-4 inches, refreshing mulch as needed to maintain that depth and attractiveness.
  • Watering cans and small containers work great for spot watering plants with different watering needs by hand. You don’t always need to get out a hose or sprinkler to get the watering done.
  • Check to make sure that you have the proper length hose(s) to reach every corner of your garden. Take into account any obstacles in the way, and be sure you aren’t dragging the hose over any delicate plantings to reach more distant dry spots.
  • Add a water wand to the hose to get the water where it’s most needed – the base of the plants – without needing to bend over repeatedly, which can cause back strain.
  • The best time to water is during the early morning hours of a sunny day. This will allow plants to absorb more water before it evaporates when temperatures rise, but won’t leave water to sit on plants overnight when mold can develop.
  • Always water plants and container gardens thoroughly and deeply to encourage deeper, more drought-tolerant root systems. It is better to water less frequently but more deeply rather than more often but with less water.
  • In the landscape, a good rule of thumb is to provide an inch of water per week minimum. Keep track of precipitation with a rain gauge to avoid wasting water by overwatering when Mother Nature does the job.
  • New individual plants that are set out, direct sown seed beds, sodding, etc. often require daily care, including watering, until established. Check moisture levels carefully during this period so the plants are well cared for.
  • Use soaker hoses to provide slow drip watering. This allows plants to absorb water easily without wasting water by evaporating from foliage or spraying into the air. Soaker hoses can even be layered beneath mulch to preserve as much moisture as possible.
  • Pay extra attention to plants in containers and hanging baskets as they tend to dry out faster and with greater frequency. These plantings will likely need to be watered daily or even multiple times a day during heat waves.

If you’ll be away on an extended vacation, or even just for a few days, make arrangements with a trusted friend or neighbor to “plant sit” while you are gone. There’s nothing worse than worrying about your garden while you’re away – except coming home to crisp plants that haven’t been watered properly!

wisewatering1

wisewatering1

Ladybugs: The Good Guys

Did you know that a ladybug can devour up to 50 aphids or more in a day? They also attack scale, mealybugs and leaf hopper, but not your precious garden plants or seedlings. Invite ladybugs to your garden – they dine only on insects and won’t harm your plants in any way.

Ladybug or Lady Beetle?

The different names given to ladybugs are almost as numerous as the number of species. You may call them ladybugs (although they are not really bugs), lady beetles (they are technically beetles), lady birds or in Germany you would say “Marienkafer” (Mary’s beetles). In North America, there are more than 350 species of ladybugs, and more than 4,000 are found around the world. Most species can be identified by the pattern of spots on their elytra (flight wing covers).

Lady beetles are members of the beetle family Coccinellidae, which means “little sphere.” In their life cycle, a lady beetle will go through egg, larval, pupal and adult stages. Lady beetles’ favorite food is the notorious aphid. A female lady bug has huge appetite, eating from 75-100 aphids per day, while the male eats about 40 per day. Most lady beetles are predators, but a few are plant eaters, and can be crop pests.

Lady beetles have some surprisingly innovative ways of protecting themselves. First is their coloring. Most predators know that bright colorings mean that their victim would likely taste bad and may even sting them. Lady beetles also produce a pungent odor when threatened, or may just play dead. Lady beetle larvae is kind of alligator-looking, so not many predators will not mess with it. Lady beetles may live in shrubs, fields, trees and logs.

Releasing Ladybugs

If you want ladybugs or lady beetles in your and – and what gardener wouldn’t? – you can buy them to release in the most needed spots. Ladybugs should always be released after sundown since they only fly in the daytime. During the night, they will search the area for food and stay as long as there is food for them to eat. The more they eat, the more eggs they lay and the more insect-eating larvae you will have. It is best if the area has been recently watered.

Ladybugs tend to crawl up and toward light. Release them in small groups at the base of plants and shrubs or in the lower parts of trees that have aphids or other insects, and they will crawl up the entire plant as they feed, thoroughly eliminating unwanted pests. They may eventually move on and out of your garden or yard, but by the time they do their job is done and you have naturally eliminated many pests while helping ladybugs spread their beauty and helpfulness.

ladybug2
ladybirds (3)

Shrubs for Summer Color

Many gardeners assume that the brightest flowers are only seen in spring, but there are many stunning shrubs that have great color all through the summer. Some feature outstanding blooms while others have equally showy foliage and can brighten up any yard. But which will look best in your yard?

Top Summer Color Shrubs

There are a number of tried-and-true summer-flowering shrubs that never fail to be impressive. Consider these favorites to enhance your landscape all summer long.

  • Hydrangea
    This very popular mounding shrub is an old-fashioned favorite, but it doesn’t have to be just your grandmother’s shrub – there are hydrangeas for every situation and taste. Flowers appear in early summer and can last for several weeks. Choose from pink, blue (use an acidic fertilizer to maintain this unusual color) or white blooms. Large flower heads great for drying or make outstanding arrangements and bouquets when cut. These shrubs do best in light shade or sun. One of the easiest hydrangeas to grow is the native American oak-leafed hydrangea has lobed leaves with fragrant, conical-shaped flower heads.
  • Butterfly Bush (Buddleia)
    This dramatic shrub is truly a butterfly magnet, and hummingbirds love it as well. One of the most fragrant flowering shrubs, butterfly bush blooms from early summer to autumn frost, and different varieties can thrive in a wide range of growing zones. The flowers can be pink, purple, blue, yellow or white, and often feature elegant spiked panicles, arching branches and interesting foliage. These shrubs do best in full sun and come in different sizes to suit different landscaping areas.
  • Spirea
    A generally low-maintenance choice, this shrub features golden yellow to lime-colored foliage all summer with pink or lavender blooms in late spring through summer. Goldmound, Gold Flame and Anthony Waterer are all great cultivars and easy care shrubs growing to about 2-4’ by 3-5’. This truly is the perfect shrub to use anywhere in the landscape, and it can tolerate sun to part shade growing conditions.
  • Rose of Sharon (Hibiscus)
    This is one of the showiest plants of the summer, and Rose of Sharon is also one of the easiest to grow. Dense growing and upright when young these shrubs will spread with age, so take care to plant them in appropriate spaces to avoid overcrowding. The dark green foliage contrasts nicely with large, showy flowers that can be up to 4” across. Flowers open in July and will continue blooming through late summer and into fall. Flowers are sterile, eliminating seed problems. This shrub is ideal to plant as a screen, hedge or focal point in full sun.
  • Blue Mist Spirea (Caryopteris)
    This shrub is a great plant for late summer color with bursts of purple-blue flowers just when many other plants are growing dull. Its low-growing, mounding habit reaches 2-3’ wide by 2-3’ tall. Blue Mist Spirea is easy to grow and can tolerate some neglect. It should be planted in full sun, and will bloom from summer to fall.

With any of these shrubs in your yard, your summer landscape can be just as colorful and eye-catching as any spring flowers or autumn foliage.

summershrub2

summershrub3

summershrub1

Caution in the Garden… Chlorosis

Yellow means caution, even for plants. While leaf yellowing, known as chlorosis, may be a signal that there is a problem that requires attention, it may also be normal. Understanding when this coloration is to be expected and when it indicates a problem is essential to be sure you’re giving your plants the proper care.

The Good and the Bad About Chlorosis

Chlorosis is the scientific word used to indicate the full or partial yellowing of plant leaves or stems and simply means that chlorophyll is breaking down. There are times when this is normal, expected coloration, and there are times when it indicates deeper problems that need attention.

  • Normal Chlorosis – Yellowing leaves at the base of an otherwise healthy plant is normal; the plant is simply utilizing the nitrogen and magnesium for exposed leaves near its top rather than older, lower leaves. These yellowed, older leaves will eventually shrivel and fall off as newer growth emerges at the top of the plant.
  • Chlorotic Response to Light – Moving a plant from full sun to shade, or visa-versa, can cause yellowing leaves as the plant reacts to the change and stress. Make sure that you grow and maintain your plant in the proper light. Also bear in mind seasonal changes that may affect how much light a plant is exposed to, even if it hasn’t been moved.
  • Chlorotic Response to Moisture – Sudden changes in soil moisture may damage or kill plant roots which can lead to yellowed leaves as the roots are unable to take up sufficient moisture. Most otherwise healthy plants, however, are able to grow new roots as they readjust. Maintain correct soil moisture or move the plants to a more favorable environment.
  • Mineral Deficiency – A shortage of some key mineral nutrients will cause chlorosis in plants. Often, a yellow leaf indicates a lack of nitrogen, however, magnesium, iron, sulfur or manganese deficiencies are indicated by yellowing leaves with prominent green veins. A magnesium deficiency will manifest itself in the yellowing of older leaves. On the other hand, an iron deficiency presents itself in the yellowing of new or young leaves. A simple soil analysis will let you know what minerals or trace elements your soil is deficient in.
  • Soil Factors – Although essential and trace elements may be present in the soil, many other factors affect how the plant uses and absorbs them. If the soil pH is too high/low or there is too much salt in the soil, the plant will not be able to utilize the available nutrients. Test your soil pH and adjust as necessary to be sure the plant can absorb nutrients appropriately to maintain proper foliage colors.
  • Toxins – Although this doesn’t happen frequently, pollutants like paint, oil, chemical solvents, airborne herbicides or pesticides or other pollutants may cause leaves to turn yellow and dark brown before dying. In this case, remove and dispose of the plant and its surrounding soil, and mark the area to be sure it can be treated appropriately and no other plants are inadvertently exposed to the toxins.

It can be alarming to see healthy plants suddenly yellowing, but by understanding chlorosis and how it happens, you can take steps to determine the cause of the color change and what to do to help your plants recover.

bug_1

Attracting Hummingbirds

It is an awesome sight to capture a glimpse of a ruby-throated hummingbird hovering over the flower garden on a sunny summer morning. One or two a year may be seen seeking food in the landscape, sampling everything in their path. Unfortunately, they leave as rapidly as they arrive. This season, attract more of these miniature avian anomalies and keep them returning year after year. 

What Hummingbirds Want 

You can charm hummingbirds to your yard with a selection of their favorite nectar-producing flowers. Hummingbirds are not attracted by scent but by color. Red happens to be their favorite, however, pink, purple, blue, orange and yellow will also catch their eye. Tubular flowers accommodate these birds’ long, narrow bills. Select a wide variety of plants that bloom at different times to keep hummers well fed all season long. Refrain from using insecticides when attracting hummingbirds, as they rely on insects for protein in their diets – especially during the summer nesting season when young hummers need extra protein for healthy growth. 

Hanging a feeder is another way to encourage these visitors. Choose one with red parts to resemble the flowers that they prefer. Fill the feeder with a mixture of one part sugar to four parts hot water to help the sugar dissolve. Fill the feeders after the mixture has cooled. Easier yet, fill with instant nectar purchased at our store. Clean feeders every 2-3 days early and late in the season, and daily in hot weather. 

Plants That Attract Hummingbirds 

The easiest way to keep hummingbirds fed without the hassle of refilling and cleaning feeders is to provide a lush landscape filled with their favorite flowers. Fortunately, that’s easy to do because these birds will sample nectar from a wide variety of blooms. No matter what your yard size, soil type, sun exposure or moisture levels, there are plants you can add to the landscape to entice hungry hummers to stop for a snack. 

Annuals

  • Flowering Tobacco
  • Fuchsia
  • Geraniums
  • Impatiens
  • Nasturtium
  • Petunia
  • Red Salvia
  • Zinnia

Bulbs

  • Canna
  • Gladiolus

Perennials & Biennials

  • Bugleweed
  • Agastache
  • Bee Balm
  • Beard Tongue
  • Columbine
  • Coral Bells
  • Daylily
  • Delphinium
  • Gaura
  • Hollyhocks
  • Hosta
  • Penstemon
  • Phlox
  • Spiked Gayfeather
  • Lily
  • Rose Mallow
  • Russell Hybrid Lupine

Vine

  • Honeysuckle
  • Morning Glory
  • Scarlet Runner Bean
  • Trumpet Vine

Shrubs

  • Honeysuckle
  • Butterfly Bush
  • Lilac
  • Weigela

Fun Hummingbird Facts 

Why not learn a little more about these fascinating birds? The more you know about their amazing abilities and unique characteristics, the more you’ll appreciate having them visit your yard! 

  •  Hummingbirds are the smallest birds in the world.
  • There are over 340 species of hummingbirds and they are found only in the western hemisphere. Most species are found in the tropics.
  • Hummers can hover as well as fly straight up and down, sideways, backwards and even upside down.
  • Hummingbirds beat their wings about 75 times per second.
  • They can drink eight times their body weight and consume about 500 insects daily.
hummingbird2

hummingbird3

hummingbird1

Spider Mites

Spider mites are one of the most common pests in landscapes and gardens and feed on many fruit trees, vines, berries, vegetables and ornamental plants, as well as houseplants. These tiny mites are just large enough to be seen with the naked eye, but may just look like tiny, moving dots. For tiny creatures, they can do considerable damage to plants if left unchecked.

How Spider Mites Hurt Plants

Spider mites cause damage by sucking cell fluids from plant leaves. A small number of mites usually isn’t a reason for concern, but plants can sustain heavy damage if populations are high and the infestation spreads. You may notice a stippling of light or yellowish spots on affected leaves and often the webbing of mites can be seen on leaves and stems. As the damage continues, leaves may turn completely yellow, dry up and fall off the plant.

Controlling Spider Mites

Spider mites reproduce rapidly in hot, dry weather, therefore, keeping plants well watered is a good deterrent to heavy infestations. There are also many natural enemies to these pernicious bugs, such as lacewing larvae and some lady beetles that help to keep mite populations under control. Cultivating these helpful insects may be all that is necessary to minimize spider mite activity unless the infestation has already increased and spread.

Because spider mites are too tiny to pick off infected plants, judicious pruning or trimming of infested plants can help remove these pests. In heavy infestations, it may be necessary to discard an entire plant to take the mites with it. Do not put these clippings or removed plants in compost piles, however, or the mites will continue to thrive and will return to healthier plants.

At times, it may be necessary to use chemicals to deter spider mites. Be careful when using broad spectrum insecticides, however, as these will kill any beneficial insects as well as the spider mites, which can disrupt the delicate balance of a garden’s ecology. Simply spraying plant leaves with a blast of water, taking care to spray the undersides as well, can help to reduce mite populations by physically removing the spider mites. Insecticidal soaps and neem oil are also good choices when dealing with spider mites.

Once the mites have been removed, damaged plants may look bedraggled, but they will generally recover within a season or two, especially if the pests were recognized and treated quickly. Don’t let spider mites catch you in their webs – get rid of them today!

How to Improve Clay Soil

Clay soil can be one of the most challenging soil types for gardeners and landscapers to work with. It is not impossible, however, to turn a clay-based plot into a lush, productive growing space. Understanding your clay soil and knowing how to improve it can help you make the most of even the densest, heaviest clay.

About Clay Soil

Clay soils are very dense and composed of extremely fine mineral particles. These soils are typically lacking in organic material but do have rich mineral components, often with plentiful calcium, potassium, and magnesium, and they’re often tinted with a reddish color. When tested, clay soil is typically alkaline on the pH scale.

Clay soil holds water very well, and can be considered poor draining. This soil can be very sticky and forms large clumps, often sticking to shoes and garden tools. When it dries out, however, clay soil will crust and form large cracks. This type of texture can be very difficult to dig and clay is easily compacted, which can contribute to smothering roots and spreading root rot.

To check if you have clay soil, squeeze a clump of dirt and see how well it sticks together. If it has a smooth texture and sticks together well, or can be rolled into a sausage shape or flattened into a ribbon without completely cracking apart, the soil has a very high clay content.

Improving Your Clay Soil

Even the heaviest clay soil can be made friendlier for planting. The key to enriching clay soil and making it better for all types of planting is to improve its texture and enhance its organic composition. To do so…

  • Add 6-8 inches of organic material on top of the clay soil. Well-matured manure, compost, grass clippings, and shredded leaves are all great options, or a mixture of different materials can be combined for a more balanced mix of organic components. Mix that material into the top 6-12 inches of the clay soil to create a healthier, easier-to-work planting bed.
  • Aerate a clay soil lawn annually and allow the removed soil plugs to break down naturally and add organic material back to the soil. Take care not to use very heavy aeration equipment, however, which can further compact the soil. If preferred, remove the soil plugs and add organic amendments after aeration instead. Very heavy clay soils can be aerated in both spring and fall.
  • Consider using raised beds for planting, adding more organic material to the beds before they are used. By raising the beds and sloping the sides, the drainage of clay soil can be improved to minimize the potential for rot.
  • Add organic mulches around both new and established plantings, such as bark chips, shredded bark, grass clippings, or shredded leaves. These mulches will slowly decompose, adding more organic material where it is needed most, but they will need to be refreshed periodically.
  • Raise and add earthworms to the clay soil. Healthy worms will burrow through the soil, improving its texture, and their castings are ideal organic material to enrich the soil and nourish plants.
  • Test your soil regularly to keep its pH balanced and adjust fertilizing options to provide the best nutrition for the plants you choose. The more you know about your soil, the better you will be equipped to keep it healthy and rich.

To improve your clay soil as much as possible, use multiple techniques to add organic material and improve its texture. While the soil can be improved, doing so is a long-term process and will require ongoing effort to keep your soil at its best.

Best Plants for Clay Soil

If you have clay soil, it is best to opt for plants that will thrive in its dense structure, high mineral content, and alkaline pH. Fortunately, there are many plants that aren’t deterred by clay soil, and you can choose from a wide range of annuals, perennials, flowers, trees, shrubs, and even vegetables that will love your clay soil. The most popular plants that do well in clay include…

  • Aster
  • Bee Balm
  • Birch
  • Black-Eyed Susan
  • Broccoli
  • Cabbage
  • Daylily
  • Fuchsia
  • Geranium
  • Hosta
  • Hydrangea
  • Lilac
  • Onion
  • Pea
  • Petunia
  • Pumpkin
  • Rose
  • Salvia

These are only a few of the plants that can do well in clay soil. The exact plants that will thrive best in your clay soil will also depend on local climate, sunlight levels, and the other considerations always important to proper planting.

More Tips for Working with Clay Soil

Regardless of what plants you want to thrive in clay soil, there are ways you should care for the soil to be sure it stays in peak condition and is as workable as possible.

  • Clay soil warms slowly in spring, so avoid planting very early when the soil will be too cool for plants to withstand any transplant shock.
  • Dig in clay soil when it is relatively dry, and break up the bottom and sides of planting holes in order to give roots an easier foothold as they grow.
  • Use stepping stones and dedicated pathways to avoid a lot of walking or other activity on clay soil, which could increase its compaction.
  • Be gentle with watering and fertilization, as clay soil cannot absorb as quickly. Too much watering or overfertilization can contribute to runoff and waste.

Clay soil is a common problem in many gardens and landscapes, but it doesn’t have to be a problem for you if you understand its special nature and know best how to improve clay and work with it appropriately. With care, you can love your clay soil and appreciate how very nourishing it can be.

Pruning Red Raspberries

There’s an unfounded rumor that raspberries are difficult to prune. This isn’t true if you understand the type of raspberry in your garden. Summer-bearing raspberries produce only one harvest per year while everbearing, or fall-bearing, raspberries can produce two harvests.

Raspberry Types

Summer-bearing raspberries plants bear fruit on one type of cane, a floricane. These large, thick canes grow fruiting lateral branches. Most of the purple and black raspberry varieties and some red varieties are summer-bearing plants.

Everbearing raspberries grow two types of fruiting canes, floricanes and primocanes. The floricanes are similar those of the summer-bearing raspberry. However, the primocane has no lateral branches. Instead, the fruit buds are located on the thick cane. Most red and yellow raspberry varieties are everbearing.

No matter what type of raspberry you grow, proper pruning improves production and the taste of the fruit, the appearance of your garden and makes it easier to harvest the delicious fruit.

Raspberry Pruning Tips

If you are growing summer-bearing raspberries, you will follow a cycle of pruning out the older floricanes, which already bore fruit. If you are growing ever-bearing raspberries, you will prune out floricanes and the top one-third of the primocanes where fruit developed in the fall. However, you can choose a second option for pruning everbearing raspberries. Simply cut the entire plant to the ground in early spring to produce berries from fall until the first frost. This sacrifices the summer harvest, but puts all plant energy into fruit production for fall harvest, creating a larger, more robust crop. It also protects the canes from any extreme winter conditions and reduces insect damage. Using row covers or greenhouses to maintain a warmer temperature easily extends the harvest season later into the fall.

To simplify the pruning process…

raspberry-chart

When you grow your own berries, you know exactly how they were grown, you save money, and best of all, they taste great, even with dirt under your fingernails!

raspberry-1

Protecting Our Pollinators

Yellow means caution, even for plants. While leaf yellowing, known as chlorosis, may be a signal that there is a problem that requires attention, it may also be normal. Understanding when this coloration is to be expected and when it indicates a problem is essential to be sure you’re giving your plants the proper care.

The Good and the Bad About Chlorosis

Chlorosis is the scientific word used to indicate the full or partial yellowing of plant leaves or stems and simply means that chlorophyll is breaking down. There are times when this is normal, expected coloration, and there are times when it indicates deeper problems that need attention.

  • Normal Chlorosis – Yellowing leaves at the base of an otherwise healthy plant is normal; the plant is simply utilizing the nitrogen and magnesium for exposed leaves near its top rather than older, lower leaves. These yellowed, older leaves will eventually shrivel and fall off as newer growth emerges at the top of the plant.
  • Chlorotic Response to Light – Moving a plant from full sun to shade, or visa-versa, can cause yellowing leaves as the plant reacts to the change and stress. Make sure that you grow and maintain your plant in the proper light. Also bear in mind seasonal changes that may affect how much light a plant is exposed to, even if it hasn’t been moved.
  • Chlorotic Response to Moisture – Sudden changes in soil moisture may damage or kill plant roots which can lead to yellowed leaves as the roots are unable to take up sufficient moisture. Most otherwise healthy plants, however, are able to grow new roots as they readjust. Maintain correct soil moisture or move the plants to a more favorable environment.
  • Mineral Deficiency – A shortage of some key mineral nutrients will cause chlorosis in plants. Often, a yellow leaf indicates a lack of nitrogen, however, magnesium, iron, sulfur or manganese deficiencies are indicated by yellowing leaves with prominent green veins. A magnesium deficiency will manifest itself in the yellowing of older leaves. On the other hand, an iron deficiency presents itself in the yellowing of new or young leaves. A simple soil analysis will let you know what minerals or trace elements your soil is deficient in.
  • Soil Factors – Although essential and trace elements may be present in the soil, many other factors affect how the plant uses and absorbs them. If the soil pH is too high/low or there is too much salt in the soil, the plant will not be able to utilize the available nutrients. Test your soil pH and adjust as necessary to be sure the plant can absorb nutrients appropriately to maintain proper foliage colors.
  • Toxins – Although this doesn’t happen frequently, pollutants like paint, oil, chemical solvents, airborne herbicides or pesticides or other pollutants may cause leaves to turn yellow and dark brown before dying. In this case, remove and dispose of the plant and its surrounding soil, and mark the area to be sure it can be treated appropriately and no other plants are inadvertently exposed to the toxins.

It can be alarming to see healthy plants suddenly yellowing, but by understanding chlorosis and how it happens, you can take steps to determine the cause of the color change and what to do to help your plants recover.

bug_1

Seed Starting

Starting seeds indoors is a rewarding gardening experience and can help extend your growing season to include more plant varieties than your outdoor season may permit. Furthermore, a larger selection of seed varieties doesn’t limit your opportunities to growing only those transplants that are available at planting time. The key to success in growing seedlings is in creating the proper environment.

What Seeds Need

Seeds are generally hardy, but to start them properly they do need gentle nurturing so they can produce healthy, vibrant plants. In general, seeds should be started 4-6 weeks before the recommended planting time so the seedlings will be large and strong enough to withstand the stresses of transplanting. Use a sterile growing mix which is light enough to encourage rich root growth. Sow the seeds thinly and cover lightly with sphagnum peat moss. Water using a fine spray but do not soak the seeds – they also need oxygen to germinate, and if they are overwatered they will drown. Cover the container with clear plastic to hold the moisture and increase humidity. Place the containers in a warm (70-80 degrees) spot and watch daily for germination. The top of the refrigerator is often an ideal location. When the first seeds germinate, place the seedlings in bright light or under artificial lights (tube lights should be 2-3” from seedling tops) for several hours each day, since late winter sunlight will not usually be sufficient to prevent weak, leggy seedlings. Daytime temperatures should range from 70-75 degrees. Night time temperatures should range from 60-65 degrees.

As Seeds Grow

When the seedlings develop their first true sets of leaves, add half-strength water soluble fertilizer to their water. Repeat every second week to provide good nourishment. Thin the seedlings or transplant them to larger containers as they grow. Before planting outdoors, harden-off the plants at least one week before the planting date. Take the transplants outdoors in the daytime and bring them in at night if frost is likely. Gradually expose them to lower temperatures and more sunlight. The use of hotkaps and frost blankets to cover early plantings will also aid in the hardening off process so the seedlings can adjust well to their new outdoor environment.

Transplanting Seeds

Transplant seedlings into the garden after the safe planting date on a calm, overcast day. Pack the soil around the transplant with as little root disturbance as possible. Sprinkle the plants with water, keeping the soil moist until the plants become established.

Popular Indoor Seed Start Dates

The exact dates you want to start seeds will vary depending on your local growing season, the varieties of plants you choose and what their needs are. In general, dates for the most popular produce include…

Vegetable Seed Starting Dates

  • February – Asparagus, celery, onion, peppers, tomatoes, eggplant
  • March – Broccoli, Brussels sprouts, cabbage, cauliflower, collards, kale, lettuce, watermelon
  • April – Summer squash, cantaloupes, cucumbers, pumpkins, winter squash

Flower Seed Starting Dates

  • January/February – Begonia, carnation, geranium, impatiens, nicotiana, pansy, rudbeckia, salvia, snapdragon, verbena, vinca
  • March 1 – Ageratum, dahlia, dianthus, petunia
  • April 15 – Aster, calendula, celosia, marigold, zinnia

Use seed starting dates as a general guide to ensure your seeds have plenty of time to reach their full harvest potential before the weather turns in autumn. At the same time, consider staggering seed starting every few days to lengthen your harvest and keep your favorite vegetables and flowers coming even longer during the growing season. As you gain more experience with starting seeds, you’ll be able to carefully plan your seed calendar to ensure a lush, rich, long harvest season.

Dormant Pruning With the Proper Tools

Late winter pruning is often recommended for many trees and shrubs. Pruning the plants while they are dormant is less stressful for the plant and it’s also easier to view the structure of deciduous trees and shrubs without leaves to ensure the pruning helps create the desired shape. It’s also a time of the year when late winter sunshine makes us all long to be in our gardens and pruning is an excellent job to get us out there.

Pruning Tools

To get out and get pruning, you will need the proper tools. There are several types of pruners that should be in every serious gardener’s tool shed.

  • Hand Pruners
    The simplest tool, but the hardest to choose, is the hand pruner. There are two distinct styles of hand pruners: the anvil type and the bypass. The anvil pruner is good for pruning deadwood or undesirable growth. For more valuable specimens anvil pruners tend to smash the wood during cutting, leaving the wound open to insects and disease. Bypass pruners are like a pair of scissors and give you an easier, cleaner healthier cut. Different hand pruners are available in different sizes and grip styles, including options for both right-handed and left-handed gardeners. To get the best results, it is important to choose a hand pruner that feels comfortable but still provides adequate strength for the job.
  • Lopping Shears
    Another tool that comes in handy is the lopping shear. They are used for making larger cuts up to 1-1/2″ in diameter, and have longer handles to provide more power without stress or strain. The longer handles also provide a better reach than hand pruners. They are also excellent for clearing away undesirable growth in your yard, including trimming hedges.
  • Pole Pruners
    The last tool you’ll need is a pole pruner. It is a combination lopping shear and pruning saw. The pole pruner extends out to twelve feet and can be used for making small cosmetic cuts or larger limb removals without needing to set up a ladder. Pole pruners are also useful in dense canopies when using a ladder would not be practical or suitable.

To learn more about pruning specific trees or shrubs and to choose the appropriate tools for the job, please stop in or give us a call. We’ll be happy to help you be sure you are equipped to make clean, appropriate cuts that will help your trees and shrubs look their very best.

dormant-2
dormant-1

Feeding Birds in Winter

Winter is a crucial time for birds. As temperatures drop, there are no insects to eat and the natural seeds are covered with snow, and as the season lengthens, the berries and crab apples are long gone. Birds need enough food to maintain their body temperatures and must search for food from sun up to dusk. If you provide nutritious options at feeders, birds will flock to your yard all winter long.

Best Foods for Winter Birds

Fatty, high-calorie foods are important for winter birds. Fat is metabolized into energy much quicker and more efficiently than seeds to help them maintain their high body temperature necessary for survival.

A number of backyard foods are excellent sources of quick energy and protein to nourish winter birds, including…

  • Suet
    Suet cakes provide an excellent energy source for birds and are often mixed with seeds, berries, fruit and peanut butter to appeal to a wider range of species. These fatty cakes are easy to add to cage or mesh feeders, or suet balls, plugs, shreds and nuggets are also available.
  • Peanut Butter
    Peanut Butter is also very popular with a large number of birds. To reduce the cost of feeding peanut butter, you can melt it down and mix it with suet or mix in cornmeal so it is not quite so sticky. Smear peanut butter on pine cones and hang them for fast, easy feeders.
  • Seeds
    When native seeds may all be eaten or hidden under snow, seeds at feeders are very important. Seeds contain high levels of carbohydrates that are turned into glucose to help with the bird’s high energy demands. They also are a good source for vitamins and some protein. Make sure the seed you purchase does not have a lot of fillers (milo and wheat seeds) that are not eaten. Mixes with sunflower seeds and millet are preferred.
  • Sunflower Seeds
    If you want to offer just one seed to birds, you can’t beat sunflower seed. Black oil sunflower seeds have a softer shell than the striped seeds and can be eaten by sparrows and juncos, as well as cardinals, finches, jays and many other birds. These seeds have a number of advantages: they are not overly expensive, they appeal to a wider variety of species and they contain a larger amount of vegetable oil to help supply the energy birds need to maintain their body heat in the winter. They are also a good source of protein.
  • Cracked Corn
    Cracked Corn is a good, inexpensive food that appeals to a large number of birds, including doves, sparrows, juncos, quail and cardinals, as well as starlings and grackles. Sprinkle the corn liberally right on the ground for larger ground-feeding birds to enjoy.
  • Nyjer
    Nyjer (thistle) seeds are small, oil-rich black seeds typically offered in tube feeders or fine mesh feeders small birds can cling to as they feed. These seeds are tiny but they pack a huge punch for oil and calories, ideal for winter feeding. Nyjer is a favorite of goldfinches, pine siskins and redpolls.
  • Nuts
    Nut meats are highly nutritious and provide necessary amino acids and protein a bird’s body cannot produce. They also have oil and are high in energy. Peanuts are the most popular nuts to offer to backyard birds, but walnuts are also a good option. Avoid using any nuts that are salted or seasoned, however, as they are not healthy for birds.

Other Winter Feeding Tips

Just providing food for winter birds isn’t enough to help your feathered friends stay well-nourished during the coldest months of the year. For the best feeding…

  • Position feeders 5-10 feet away from bushes and shrubs that may conceal hungry predators.
  • Use broad baffles to keep squirrels off feeders and to shelter the feeders from snow and freezing rain.
  • Refill feeders frequently so birds do not need to search for a more reliable food source, especially right before and after storms.
  • Use multiple feeders so you can offer a wider variety of different foods and more aggressive birds cannot monopolize the feeder.
  • Provide water in a heated bird bath so thirsty birds do not have to use critical energy to melt ice and snow to drink.

Feeding birds in the backyard can be a wonderful winter activity, and if you offer the best, calorie-rich foods birds need, you’ll be amazed at home many birds come visit the buffet.

feeding-birds-winter-2

feeding-birds-winter-3

feeding-birds-winter-1

Dealing With Winter Damage

It’s early spring – time to survey the damage that winter has produced. In some areas, shrubs may still be hiding under piles of frozen snow, and could be crushed or compacted. Severed tree limbs may lie scattered across the landscape, and bark may be torn and stripped from trunks. It’s difficult to know what to tackle first, but fortunately, much of the damage is easily correctible.

Repairing Winter-Damaged Trees

When surveying and repairing winter damage, start with your trees – they are generally the most valuable additions to your property. As you survey the damage – broken limbs, torn bark, a tilting trunk – ask yourself “Is this tree salvageable or should it be removed?” If the damage is extensive, or you are unsure about how the damage may affect the tree’s overall health or future growth, hire a professional for a consultation. Replacing a severely damaged tree with a younger one, perhaps a type you like even better, may be the best solution.

If a limb is broken somewhere along its length, or damaged beyond repair, employ good pruning practices and saw off the remaining piece at the branch collar, being careful not to cut into the trunk or leave a stub. Sometimes a fallen limb may strip bark off the tree trunk. To repair this damage, cut the ragged edges of the loose bark away from the stripped area to firmly affixed healthy bark. Nature will take care of the rest. Even if the trunk of the tree is split, the tree may still be saved. For large trees, repairing this type of damage usually requires cabling and bracing done by a professional. If the tree is still young, the crotch may be pulled tightly together and tied or taped until the wound eventually heals.

Repairing Winter-Damaged Shrubs

Shrubs can suffer the same damage as trees, including broken limbs and stripped bark. Heavy snowfall can crush smaller shrubs, and larger varieties may have their trunks or centers split from heavy snow or ice accumulation. Most shrubs are resilient, however, and slowly regain their shape as the weather warms. If branches are bent but not broken, you may tie them together to help them along and prevent further damage from late-season storms. Do not tie tightly and remove twine after about a year. Completely broken branches may be pruned away, but take care to maintain the shrub’s form and balance, keeping in mind its growth pattern so it will not look lopsided or ungainly. Again, if the damage is severe, you may need to replace the plant.

The harder the winter is, the more of a beating trees and shrubs will take. With prompt attention in early spring, however, you can easily undo much of the damage and help your landscape recover with ease.

damage_1damage_2

Spring Lawn Renovation

Spring is the ideal time to spruce up your lawn. After a long winter, you can easily see where any bald, bare or thin patches exist, as well as where weeds or fungus may be taking over the lawn. Fortunately, there are easy ways to set your lawn to rights!

Seeding

If you are planning to seed a new lawn or overseed an existing lawn, it is best to seed as early as possible. It is important to get seed germinated and growing before trees begin to leaf out, when the trees will be usurping more of the soil’s moisture and nutrition and new leaves will block sunlight from the grass seed. This is especially true in more heavily shaded areas. Keep the area moist at all times until the roots of grass seed become established, then you can gradually decrease the frequency of watering. The new grass can be mowed when it reaches a height of about three inches.

Rejuvenating a Weak Lawn

Your lawn cannot live without air, water and nutrients, but decaying material matted down between grass blades can smother even the healthiest-looking lawn. This decaying material is called thatch, and when a thick layer of thatch builds up, water and fertilizer may run off instead of penetrating the soil. Applying Humates, aerating,  and dethatching can help rejuvenate a lawn by restoring passageways to the soil. Spring is an excellent time to dethatch cool-season grasses. Thatching rakes can be used, or you can use a metal rake to remove thatch by hand. Humates will help speed up the natural decomposition of the thatch.

Adusting pH 

The pH of your soil has a direct impact on the health of your lawn. Test your soil to determine the pH (simple kits are available to do this). We recommend a small handful of soil taken from a depth of 3 inches to get the most accurate reading. At a pH of 6.8-7.0 nutrients are most readily available to turf grasses, and beneficial microorganisms are more active to decompose thatch and keep the soil structure healthy. If your pH is too low or too high, consider amending the soil as needed to help bring it to a more desirable level.

Fertilizer and Weed Control

On established lawns that you are not overseeding, apply Sunnyside Gardens 16-16-8 fertilizer in early to mid-April.  Remember, crabgrass and other annual weed seeds start to germinate when the soil temperature reaches 50-58 degrees. Use a pre-emergent like Dimension for crabgrass control on an established lawn.

On newly seeded lawns and those seeded in late fall or during the winter months, use a starter fertilizer like Sunnyside Gardens 8-16-8. You will need to reapply in four to six weeks. 

Maintaining your lawn at a higher level will allow you to control weeds without the use of chemicals.  Broadleaf weed sprays can be used to kill weeds as they appear.

Insect Controls

An application of Bonide Grub and Insect Control Granules in May and again in July or a similar insecticide will provide effective white grub and billbug control for the growing season. This preventative method tends to give better results than applying insecticides when you notice damage as it then may be too late. If you have routinely had problems with other insects, opt for products specifically targeted for those pests to ensure effective control.

A lot goes into having a lush, healthy lawn, but if you take the appropriate steps to rejuvenate your lawn in spring, you’ll be rewarded with thick, healthy, resilient turf to enjoy from early spring until snow flies again.

spring_lawn_3

spring_lawn_1

Grass sprinkler

Conserving Water Through Proper Planting

Worried that you may have to give up color in your landscape to save on maintenance and water? Afraid that watering restrictions in your area will put a damper on your colorful flowerbeds, borders and shrubs? It doesn’t have to be that way! Many brightly-colored trees, shrubs and flowers don’t require as much water once they become established, which generally takes about a year. The key is knowing which plants to select and how to treat them for that year. 

Choosing Plants That Tolerate Drought 

The key to keeping your color while losing the water is to opt for plants that aren’t quite so thirsty. Fortunately, there are all types of beautiful drought-tolerant plants to choose from, with more cultivars being developed every year. 

Dry soil tolerant plants include: 

Annuals

  • Cosmos
  • Nasturtium
  • Portulaca
  • Strawflower
  • Verbena

Perennials

  • Achillea (Yarrow)
  • Anthemis (Golden Marguerite)
  • Artemesia (Wormwood)
  • Asclepias (Butterflyweed)
  • Baptisia (False Indigo)
  • Echinops (Globe Thistle)
  • Gallardia (Blanket Flower)
  • Hemerocallus (Daylily)
  • Rudbeckia (Black-Eyed Susan)
  • Salvia (Sage)
  • Sedum (Stonecrop)
  • Stachys (Lamb’s Ear)

Shrubs

  • Berberis (Japanese Barberry)
  • Buddleia (Butterfly Bush)
  • Chaenomeles (Quince)
  • Cotinus (Smokebush)
  • Hypericum (St. John’s Wort)
  • Juniper
  • Ligustrum (Privet)
  • Potentilla
  • Rhamnus (Tallhedge)
  • Yucca

Establishing Drought-Tolerant Plants 

To be sure drought-tolerant, water-saving plants get the good start they need, it is important to plant them in appropriate locations. Some do well in full sun, others need varying amounts of shade. Also pay close attention to soil needs, including pH values – the chemical composition of the soil affects its water retention and the ability of plants to absorb that water effectively. If your plants are in the right spot, they will flourish with the best foliage and flowering possible, even with little watering. 

Plant drought-tolerant plants as early as possible so they can begin growing strong, absorbent roots well before the driest days of summer, and use drip watering systems, mulch and windbreaks to protect delicate plants from too much heat stress. Grouping plants with similar watering needs together can also help minimize water loss by avoiding irresponsible watering. 

More Watering Tips 

To make the most of every drop of water you offer to your garden, flowerbeds or landscape… 

  • Water in the very early morning when the air is still cool and less water will evaporate before it soaks into the soil.
  • Water deeply but infrequently to help plants stretch their roots deeper into the soil seeking moisture.
  • Check your irrigation system regularly for any leaks or other problems that could result in poor watering practices.

With thoughtfulness and care, you can easily enjoy beautiful, colorful flowerbeds, gardens and landscaping even without a great deal of water.

conserving-water-1

Watering: How Much?

Water is critical for a healthy garden and landscape, but how much water is too much, how much isn’t enough and how much is just right? Unfortunately, there isn’t a specific answer that suits every gardener’s needs. All plants have different water requirements, which change depending on the type of soil, amount of sun, temperature, humidity, season, maturity of the plant and overall growing environment.

Initial Watering

All plants, including specimens described as drought tolerant, will require water when first planted. This is because many of the smaller roots responsible for water uptake are usually damaged during shipment and planting. Build a small circular soil wall around the plant to contain water while it percolates into the soil. Watch new plants carefully and keep them well-watered as their roots settle in and they adapt to their new or transplanted location.

Groups Are Good

It’s a good idea to have some knowledge of the plant’s water requirements when determining the location in the garden. It will keep watering simple if you plant a new specimen near other plants with similar water requirements. In this way, there is no need to readjust an irrigation system or watering schedule, since all the plants in the group have similar needs.

Need a Drink?

Because plants’ watering needs can change through the season, how can you tell if a plant needs more water? Most plants will wilt as the soil becomes too dry. The leaves may droop, and if it’s an upright plant, the top ends may become soft and bend over. Glossy plants may begin to look dull, while thick leaves will shrivel. If you notice these signs, it is time to water! Most plants will revive if watered quickly enough, but be sure to water deeply rather than allowing moisture to run off the surface.

How can you tell if you should water? Push your finger into the soil an inch or two from the base of a plant. Perfect soil should feel cool and slightly moist. Some soil should stick to your finger. If none does, it’s too dry. If it’s muddy, don’t water. Overwatering kills plants by depriving the roots of oxygen. Some gardeners use water meters to see the precise amount of moisture. If you’re unsure, this tool can be helpful.

Adjusting Your Watering Schedule

The amount you have to water your plants or landscape can change from day to day. A cool morning will allow more dew to form and drain to the soil, or a sudden afternoon thunderstorm can be enough water to keep your plants hydrated for a few days. An overly hot day, however, can rapidly deplete water resources and extra watering may be required. Check your plants and landscape regularly to be sure they are getting adequate water, and make adjustments as needed to keep them suitably moist without either too much or too little water.

Need help monitoring water? Stop by to see our collection of water gauges, meters and monitors that can help you be sure you are watering your landscape correctly.

watering_1

watering_2

watering_3

Lilacs

One of the most popular deciduous flowering shrubs, and certainly one of the most nostalgic, lilacs herald the arrival of spring. When we reminisce about this old-fashioned favorite we recall large panicles of sweetly scented, pale purple blossoms. Today, however, lilacs are available in an incredible variety of sizes, growth habits, flowering times, bloom sizes, shapes, colors and fragrances.

About Lilacs

Lilacs belong to the genus Syringa that consists of approximately 20 different species and about 1,000 different varieties. Most species are native to Asia, but Syringa vulgaris, the common lilac, is an Eastern European native. Some of the finest cultivars of this species were bred in France in the early twentieth century, hence the term “French Hybrid.” Lilacs were cultivated in America’s first botanical gardens and grown by both George Washington and Thomas Jefferson. They remain a steadfast favorite to this day in public gardens as well as backyards, and many municipalities even host lilac festivals to celebrate these blooms each spring.

Proper Lilac Care

If cared for properly, a lilac bush has the potential to survive for hundreds of years. Planting your lilac in pH neutral, well-drained soil that is high in organic matter will help ensure the longevity of your shrub. Providing at least 6 hours of direct sun each day and deadheading immediately after flowering will guarantee an abundance of lovely scented blooms. Give lilacs adequate growing space so that they may grow to their full potential. Spacing these plants too closely will cause them to grow tall and spindly and only flower at the top; instead, be sure they have plenty of room to grow out as well as up and you’ll be rewarded with copious blooms all over the shrub. Fertilize with a high phosphorus fertilizer in the early spring to ensure the best growth and most luxuriant blooms.

When your lilac reaches a height or shape that is no longer to your liking, you may remove up to 1/3 of the thickest stems. Cut them back to the ground. You may also shorten any unusually tall stems by cutting them back to a strong branch. Open up the crowded base of the shrub by removing a portion of the youngest stems. Remember; prune lilacs immediately after flowering before plants start to form next year’s flower buds.

Beyond the Classics

Syringa vulgaris provides the spring garden with perfumed blooms for up to two weeks. To extend the bloom season for up to 6 weeks, plant an assortment of the uncommon species along with the common lilac. Some excellent choices are hyacinthiflora (which blooms before vulgaris), paired with palibin, prestonia and reticulate (which bloom consecutively after vulgaris).

Want to branch out into even more lilac cultivation in your yard? Come in today to see the latest lilacs to love.

lilac_4

lilac_1

lilac_2

lilac_3

Fall Lawn Care

Fall is the best time of the year to overseed your existing lawn or establish a new lawn. If your lawn is a bit thin, has bare patches or needs good care, now is the time to take care of it so it can become thoroughly established before warm temperatures arrive in spring.

Overseeding A Weak Lawn

A weak lawn may have thin or scraggly patches, seem overrun with weeds or have bare patches that are difficult to keep green and lush. Overseeding can help eliminate these problem areas and create a more consistent, luxurious lawn.

  1. Spray broadleaf weeds with a selective herbicide and wait 2 weeks for the weeds to disappear. Several treatments may be necessary if the yard is thick with weeds.
  2. Take a soil sample of your lawn to determine the pH. A garden extension service can help determine pH levels, or home test kits are available.
  3. Mow shorter than normal and rake clean to remove unnecessary debris that may keep seeds from reaching the soil.
  4. Core aerate if you have compacted soil or heavy thatch. Remove the cores and dispose of them properly to keep the soil light and airy for seeding.
  5. Apply starter fertilizer and lime if determined to be needed by the pH test, or choose a grass type that will thrive in your soil’s conditions.
  6. Dethatch your lawn if thatch is thicker than ½ inch. This can be done with heavy raking or a special dethatching rake may be necessary in extreme cases.
  7. Overseed with the proper seed. If core aerating, lightly topdress with topsoil.
  8. If needed, cover the freshly seeded area with netting or hay to discourage birds or other wildlife from consuming the seed before it grows.
  9. Water daily until grass has germinated, then soak once a week to encourage deep root growth.
  10. Fertilize in late fall with fall fertilizer.

Seeding A New Lawn

If you have no existing lawn or the entire ground is overrun with nothing but weeds, it may be best to start from scratch and create the lawn of your dreams.

  1. Kill existing vegetation with nonselective herbicide. If you want to preserve nearby trees or shrubs, take steps to protect that vegetation from the treatment.
  2. Take a soil sample of your lawn to determine the pH. A testing kit can provide a good pH estimate, or a gardening center or garden extension service can provide a more precise evaluation.
  3. Prepare soil by breaking up the surface with a rake or spade using a crisscross pattern. All large lumps should be broken up, and any large rocks should be removed.
  4. Broadcast starter fertilizer, lime and gypsum as determined by the pH test. This will provide a nutrition boost for fresh seeds.
  5. Spread topsoil or humus to a ½ inch depth for appropriate planting.
  6. Rototill to a depth of 4 inches and grade smooth. This will mix all the top layers together for uniform soil and nutrition, ensuring even turf growth.
  7. Sow proper seed and mulch lightly with salt hay to control erosion and conserve moisture.
  8. Water daily until grass has germinated, then soak once a week to encourage deeper root growth to resist droughts and repel weeds.
  9. Fertilize in late fall with fall fertilizer to provide nutrition throughout the season.

Which Seed?

Not every lawn will thrive with the same type of grass seed. Allow our staff to help you select the seed that best suits your needs, soil type and planting conditions. Apply at the recommended rate and incorporate into the top ¼” of soil. Do not bury the seed or it may not germinate evenly.

No matter what the condition of your lawn, fall is the best time to take steps to help it rejuvenate so you have an amazing lawn to enjoy in spring.

FallLawn_2FallLawn_1

Over-Wintering Container Plants Outdoors

All containerized plants that are considered hardy in your zone can spend the winter outdoors, but you do need to take a little special care to keep them safe and comfortable as temperatures drop. Despite their hardiness, winter is still a challenging season, but it is possible to keep your container plants healthy until the days grow longer and warmer again.

Options to Overwinter Your Container Plants

  • In the late summer or fall, removed the plant from its container and plant it in the ground while the soil is still warm. Another method is to bury the pot, with the plant in it, in the garden and remove the pot following spring. Both of these methods will help insulate the root system, preventing it from freezing solid and killing the root system.
  • Place containerized plants in an unheated garage but along a heated wall. This is an excellent method for very large pots or porous pots that tend to break apart from the constant cycle of freezing and thawing, and so would not be very hardy if buried. For extra root protection and insulation, wrap the pots in plastic bubble wrap or wrap an old comforter or quilt around the pots.
  • Group pots together along the sunny side of your house or shed. If this area is windy, create a windscreen with stakes and burlap. Place bales of straw or hay around the perimeter of the grouping up against the pots to further protect plants from cold winds. Fill in areas between pots with mulch, shredded leaves, grass clippings or hay for insulation. Lay evergreen branches or place a layer of mulch on top of the pots for additional protection.
  • Use a cold frame covered with plastic or Reemay fabric to help control temperatures and reduce light as well, helping plants stay dormant in winter. It will still be necessary to use mulch, shredded leaves or hay around and in-between pots for insulation. Rodent control, such as Havahart traps, may be necessary when using this method.

Watering Container Plants in Winter

Make sure that plants go into the winter with moist soil so that there is water available to plant roots. Check soil moisture occasionally, never allowing it to dry completely. It is also a very good idea to spray needled and broadleaf evergreens with an anti-desiccant. This acts as a protective coating for plant foliage and stems as it helps them retain moisture.

With just a little care and forethought, you can easily prepare containers for winter without risking the plants and arrangements you have so carefully cultivated.

over-winter-2
over-winter-1

Bring on the Bulbs for Better Home Value

Many homeowners, whether they just purchased their home or have owned it for years, are interested in increasing the value of their property. A better value leads to greater home equity, a higher resale price and the personal pride of owning a lovely home. Good landscaping can lead to a better home value, and there’s no easier way to improve landscaping than with beautiful bulbs. 

How Landscaping Adds Value to Your Home

A well-groomed, thoughtfully planned and attractively maintained landscape is a great asset to your home. Your home’s exterior, including its landscaping, is the first impression visitors see, and good landscaping creates an attractive, welcoming atmosphere. Colorful landscaping can help attract notice to your property, while larger plantings provide shade and help with temperature control. Borders can conceal fences or unsightly foundations, and flowerbeds soften the edges of the house structure to provide an appealing sense of nature. Unlike interior home improvements that come and go with the latest design trends, good landscaping is a constant asset to your property and your home value.

Why Bulbs Are Best

Bulbs are some of the best options to improve your home’s landscaping and increase your home value. While bulbs won’t grow to provide shade to your yard and don’t yield tasty treats in a garden, they have many benefits that add solid value and enjoyment to any yard.

  • Bulbs Are Familiar
    Unlike exotic tropical plants or little-known cultivars of tree and shrubs, many bulbs are instantly recognizable. That familiarity is comfortable and reassuring, and adds a sense of peace to your landscaping. Tulips, daffodils, hyacinths, crocuses and lilies are some of the most popular and tried-and-true bulbs that can enhance your landscaping.
  • Bulbs Are Versatile
    While many plants can serve only one distinct purpose, bulbs can serve many purposes. Taller varieties can provide an effective screen for privacy or create stunning borders. Dense bulb patches can “paint” your landscape with flowing color, or bulbs can be layered in pots or containers for instant beauty. Bulb flowerbeds can be positioned along your home’s foundation, around trees or lining walkways, driveways or sidewalks. Bulbs can be strategically positioned to fill in thinner areas in your yard or landscaped beds as well.
  • Bulbs Are Beautiful In Different Seasons
    While a spring-blooming annual or a brilliant fall foliage tree may look stunning for one season, many bulbs offer beauty for far longer. Not only are their flowers showstopping beauties, but many bulbs have thick, graceful foliage that is delightful long after blooms may have faded. Furthermore, you can mix-and-match bulbs to keep a bed blooming from early spring to late fall without difficulty.
  • Bulbs Are Perennials
    Annual flowers are gorgeous but need to be replaced every year, a process that can be very time-consuming and labor-intensive. Bulbs, on the other hand, are perennials that will keep coming back year after year with very little extra care. With just basic maintenance – watering and the occasional removal of dead foliage – bulbs will grow back more lush and vibrant each year, continuing to add value to your home.
  • Bulbs Are Easy
    There’s no denying that bulbs are easy to grow and require very little maintenance to look their best. Bulbs can tolerate a wide range of soil types, pH levels and sunlight levels, and they often thrive even when neglected. This makes them an easy addition to any landscape, bringing their proven value to your yard quickly.

Improving Your Landscaping With Bulbs

It’s easy to improve your home’s value by adding bulbs. Simply choose the types and colors of bulbs you want, and you’re just three steps away from a beautiful landscape and a more appealing home.

  1. Dig – Dig the appropriate hole to plant your bulbs, paying attention to the recommended depth for the bulb type. You can dig individual holes for each bulb, or plant an entire bed at once.
  2. Drop – Drop the bulbs in the holes. You can position them in graceful, cultivated rows, or choose a more organic, natural look. Cover the bulbs firmly with soil and a layer of mulch if desired.
  3. Done! You only need to keep a simple eye on moisture levels and the occasional critter that may enjoy a bulb snack, and you’re done with bulb care and maintenance. Before long, both your bulbs and your home value will be blooming!

With so many benefits from landscaping and the ease of bulbs to create a stunning look, why not add to your home’s value today? Get digging – you’ll be done before you know it!

Fall Mulching Pros and Cons

Mulch can add a protective layer to any fall garden, flowerbeds, or shrubs, but is it best for your landscape? Understanding the pros and cons of fall mulching can help you better prepare all your plants for the changing season.

Benefits of Fall Mulching

There’s no denying that when done properly, mulching in fall can provide enormous benefits to the landscape. The biggest pros of fall mulching include:

  • Insulating the soil.
    Fall mulching preserves heat that will keep microbes, earthworms, and other life active and thriving in the soil longer to improve the soil condition. The insulation mulch provides will also help moderate temperature swings that can damage tender roots, especially those of newly planted plant material.
  • Saving time with spring chores.
    Spring is a hectic season in the garden, but if mulching is already done in the fall, it doesn’t need to be redone in the spring and there will be more time to spend with other planting and gardening tasks when the weather warms.
  • Easier climate for working.
    The milder temperatures of autumn make it more enjoyable to spend time outdoors with the heavy labor of spreading mulch. This is especially true if you will be mulching multiple flowerbeds, tree rings, borders, and other spaces throughout the landscape.
  • Simpler to spread.
    If you mulch in spring, you may need to be delicately working around emerging sprouts and blooming bulbs. In fall, however, the work is less delicate after beds have already been cleaned out, and you can spread mulch much more quickly and efficiently.
  • Weed suppression.
    Weeds don’t stop growing when summer ends, and just like spring mulching, spreading mulch in fall will help minimize weeds. This will make it easier to keep weeds under control when spring arrives again, and growth is renewed.
  • Preventing soil erosion.
    Soils on sloped beds can quickly erode in autumn and winter weather as rain and snow batter the slopes. A good layer of mulch will protect the soil and keep it in place throughout the season, so it is ready to work again in the spring.
  • Nourishing the soil.
    Organic mulches that are spread in autumn will have several months to settle and begin decaying. This will introduce more nutrients into the top layer of soil, so it is richer and healthier for spring planting.
  • Tidy Appearance
    A fresh layer of mulch will always make the landscape and garden look well-tended.

Problems With Fall Mulching

While fall mulching can be very beneficial to the landscape, it may not be the best choice for your gardens. Potential cons of fall mulching include:

  • Stopping self-sowers.
    Any herbs or flowers that would normally self-sow as seeds ripen will be inhibited by a layer of autumn mulch, and the yield for new growth in the spring will be significantly reduced. The thicker the mulch, the fewer seeds will germinate.
  • Time constraints of shorter days.
    While the autumn climate may be perfect for big mulching jobs, shorter days and the risk of early snows or freezes can make it difficult to complete the undertaking. If the mulching is started too late in the season, it may not get finished before winter begins.
  • Loss of winter interest landscaping.
    One benefit of fall mulching is that it is easier to spread the mulch over already pruned perennial beds. This same step, however, requires pruning perennial stems back which removes that winter interest from the landscape as it takes away stems, berries, and seeds that winter wildlife may have needed.
  • Attracting unwanted pests.
    A deep layer of fresh mulch can be very attractive to unwelcomed fall and winter guests, including rodents and slugs that will burrow into the mulch and make themselves at home until spring. This problem can be minimized by taking care not to use too much mulch in autumn.
  • Depriving roots of oxygen.
    While fall mulch will help moderate soil temperatures to protect delicate roots, a thick layer may also stifle airflow into the soil and deprive roots of essential oxygen. At the same time, excess moisture that accumulates under a thick mulch layer could lead to problems as well. Be sure to keep your fall mulching to no more than 2 inches deep from plant stem to the dripline.
  • Fading before spring.
    Once fall mulch is laid, it will begin decomposing and could lose its sharp color and freshness long before spring arrives. This can be fixed simply by turning the mulch in the spring to refresh the layer even as new bulbs and shoots are starting to pop up to greet the season.

Fall Mulching Tips

Every gardener must decide when to mulch, and if you do want to take advantage of the benefits of fall mulching, doing so carefully can help prevent many of the cons. First, adjust the mulch depth to match the requirements of your local climate and plant needs – a layer 2-4 inches deep is typically adequate. Apply fall mulch after the first hard freeze when perennials can be cut back easily but take care not to pile it against tree trunks or shrub bases where it may invite gnawing pests or induce bark rot.

Mulching can be a very productive fall chore for flowerbeds, garden spaces, borders, and other parts of the landscape. It has to potential to save you time and energy and help keep your property looking its very best not only in autumn, but through the winter and into spring once again.

Fall Chrysanthemums

No flower is more iconic of autumn than the chrysanthemum, and these beautiful mounding perennials are ideal for fall flowerbeds, pots, window boxes, borders, and many other uses. How will
you get creative with chrysanthemums this fall?

Why We Love Chrysanthemums

Just when many other flowers are fading at the end of summer, chrysanthemums, or mums, are coming into their glory with a range of stunning autumn colors. Depending on the cultivar, these plants sport yellow, white, red, orange, bronze, pink, peach, wine, purple, and bicolored blooms. The flowers range from small, button-like blossoms to larger blooms reminiscent of daisies. Mum blooms are long-lasting when cut and they’re just as lovely in floral arrangements and bouquets as they are planted in containers, flowerbeds, and the landscape. This makes mums extremely useful for all manner of autumn décor.

Chrysanthemums are native to east Asia and northern Europe and were first domestically cultivated in China nearly 600 years ago. Today, there are more than 20,000 chrysanthemum cultivars worldwide. They are deer- and rabbit-resistant, making them a hardy option for landscaping beds, and with a bit of thoughtful care, these tender perennials can be a wonderful addition to any flower garden or fall containers.

Caring for Chrysanthemums

The hardiness of chrysanthemums depends on the cultivar as well as the local climate and even the microclimate in your landscape. These flowers prefer well-drained, rich soil with a neutral pH, so it is best to use a good quality potting soil in containers. When planting chrysanthemums in the garden or landscape, mixing compost or peat moss in the planting hole will help increase drainage and nourish the soil to promote the best blooms. A good rule of thumb is that if soil is good for vegetables, it will also be good for mums – making them a wonderful choice to refresh a garden after the summer harvest has finished.

Chrysanthemums grow best in full sun requiring a minimum of six hours per day. If mums are planted in containers, consider using a mobile plant cart or a stand with casters so  that the pots may be moved to brighter areas, if needed, as the season progresses.

Chrysanthemums prefer evenly moist, but not soggy, soil. Because of their thick, mounding habit, it is best to water mums from below suing a soaker hose or irrigation drip system in garden beds. In pots, mums should again be watered from below the plant but above the soil line. A watering wand will make this job direct and easy. Be sure to drain excess water from saucers after watering so the roots do not remain continually wet.

Fertilizing chrysanthemums every month through the spring and early summer, with a balanced fertilizer, will help them grow and bloom well, but if mums are planted in the Fall, they should not need extra feeding as long as they were planted in rich, nutritious soil. Deadheading spent blooms by pinching them back can encourage more flowering and help mums maintain their compact, mounding habit.

Decorating with Fall Mums

Chrysanthemums are a beautiful choice not only in the garden, but are equally lovely in welcoming porch pots, deck or patio containers, or even small indoor pots and arrangements. Add an extra touch of fall with rustic containers, such as wine barrels, baskets, or terra cotta pots, or glam up your mums in hammered copper or bronze pots that will accentuate their color. A burlap ribbon or bow can be a charming accent, and you can give more seasonal flair to mum arrangements or flowerbeds by adding pumpkins and gourds as fun decorations. Indoors, use small pails or pots for petit mum arrangements, or add them to larger arrangements with grain sprigs, dried pods, colorful leaves, or twists of grapevine for additional texture.

Fall chrysanthemums can be a pleasant burst of autumn color, whether they are part of the landscape or are used in containers, pots, or arrangements and we carry a wide selection to make your fall home suit the season!

Fall Gardener’s Calendar

SEPTEMBER

Spruce up the landscape by planting Fall Pansies, Flowering Cabbage & Kale,  Garden Mums,  Fall-Blooming Perennials as well as Trees and Shrubs.

Test your lawn pH to determine if you need to apply sulfur this season.  Sulfur should be applied at a rate of 1-2 lbs. per 100 sq. ft.

Pick up your Spring Flowering Bulbs like tulips, daffodils, crocus, hyacinths, and more!  An Auger for the drill will also help make planting easier.

Plant cool-season salad greens (arugula, lettuce, radishes and spinach) in cold frames.

Apply Superphosphate now to coax stubborn plants into bloom next year.

Aerate, re-seed and apply Fall Lawn Food, such as Sunnyside 8-16-8 to the lawn.  Keep grass seed damp; water every day if necessary.  You will also want to check for grubs.  Increased activities of skunks, raccoons and moles as well as brown patches that peel back easily are an indication of grub activity.  Apply Bonide Grub and Insect Control Granules to control the grubs.

Treat houseplants with Systemic Granules and Spinosad Soap now to get rid of any insects before bringing them into the house prior to the first frost.

Clean out garden ponds and pools and begin to cut back perennials.

OCTOBER

Plant bulbs.  Fertilize with Bone Meal or Dutch Bulb Food and water in well.

Divide daylilies and spring-blooming perennials, including iris and peonies. Don’t be tempted to prune your spring flowering shrubs like forsythia, lilac,  spirea or viburnum or you will destroy next year’s buds.

Rake leaves from the lawn and lower the mower blade.  Check your compost pile.  Now is a good time to add Compost Maker to help break down brown leaves and lawn clippings.

Dig up summer-flowering bulbs, such as dahlias, cannas, tuberous begonias, and gladiolus after the frost kills the top growth.  Treat them with Bulb Dust, pack them in Peat Moss, and store them in a ventilated area for winter.

Fertilize your trees with Jobes Tree Spikes or Baicor Tree Feast after the leaves fall. Fertilize shrubs with Ferti-lomeTree and Shrub Food.  Spray hemlock again with Bonide All-Season Spray Oil.

Set up bird feeders.  Clean out birdbaths, refill and purchase heaters for the winter.

End of October- Clean up and destroy diseased rose leaves and debris surrounding shrubs and perennials. Mound 10-12 inches of mulch around roses to protect from winter damage.

Apply Sunnyside Gardens’ Winterizer to the lawn.

Remove annuals, roots and all, and add to your compost pile, but do not add any diseased material to it.

Cut back perennials unless they feature ornamental seed heads and Fertilize with 8-16-8.  Prune long raspberry and rose canes back to a height of three feet.  Clean up your beds and gardens to avoid harboring insects and diseases over the winter.

Pot hardy spring bulbs (crocus, daffodil, hyacinth,and tulip) and place in a cold frame or cool garage (40 degrees) or sink into the ground and mulch.  Keep evenly moist.

Update garden records, noting successes and failures, gaps in planting, future planting and landscape changes.

Water all landscape plants well and mulch before the winter cold sets in.

Spray evergreens with Wilt Pruf or wrap with burlap for protection against wind and cold weather.

Repotting Houseplants

Fall is an excellent time to repot many houseplants. Potted plants that have been growing outdoors during the summer have probably grown quite vigorously due to the high light levels and greater humidity. If the top growth of the plant has increased in size by 20 percent or more, it probably should be transplanted into a larger container so the roots can stretch and settle comfortably.

Before You Repot

Before repotting, check the plant and the soil carefully for insects.  Add systemic granules to the soil and spray the leaves with an insecticidal soap to remove any unwanted pests. If an insect infestation is particularly bad, it may be necessary to remove most of the plant’s soil and replace it with fresh potting soil. Avoid using soil from the garden, however, which will harbor insect larvae and eggs as well as weed seeds and other material you do not want in your houseplants.

Acclimating Plants

Bring your plants indoors well before any danger of frost for proper acclimation to the indoor environment. The change in light levels and humidity could shock more delicate plants, and they may wilt temporarily or drop leaves before they adjust to the new conditions. If possible, bring them in just a few minutes at a time for several days, gradually increasing their indoor time to several hours before keeping them indoors all the time. Flowering tropicals will also benefit from cutting back some of their foliage to avoid shock before being brought indoors.

To help houseplants overcome the transition from outdoors to indoors, position them in a bright, sunny area and consider adjusting indoor temperature and humidity controls to more closely mimic outdoor conditions. Make adjustments slowly and gradually, and the plants will adjust.

Time to Repot

Once your houseplants are adjusted to their indoor fall and winter environment, they can be safely repotted without adding to their stress. Repot the plants early in the day, and move them to a slightly larger pot. Avoid jumping several pot sizes, which could lead to excessive root growth while the foliage is neglected. Be sure to fertilize and water the plants appropriately to provide them proper nourishment as they settle into new pots. Do not expect luxuriant foliage growth right away, however, as it will take some time for the plants to begin growing again, especially in fall and winter when most houseplants are entering a dormant, slow growth period.

By repotting your houseplants in fall, you can help healthy, vigorously growing plants adjust to a new environment and continue their growth with ease in a new, larger, more comfortable pot.

Repotting_1

Spruce Up for the Holidays

Spruce are beloved as potted Christmas Trees. Both the Colorado and Colorado Blue Spruce have a nice pyramidal shapes with strong limbs that can hold heavy ornaments or light strands. The Colorado Blue is set apart by its stunning steel-blue foliage. 

Beyond the holidays, spruces make a lovely addition to any landscape. When viewed in the northern forests, these majestic, needled evergreens are glorious with their graceful, symmetrical, conical forms. Smaller landscapes may also enjoy the merits of this genus with the many slow-growing and dwarf cultivars that are commonly offered, many of which are also ideal when selected as living holiday trees. Larger spruces work wonderfully planted in a row as a windbreak but shine equally as well when chosen as a specimen plant. Added benefits include deer resistance and salt tolerance.

Caring for Your Living Christmas Tree

If you do opt for a potted spruce, there are certain steps you need to take so they can survive the rigors of the holiday and be ready for planting. 

  1. Only leave a live spruce tree inside the house for a maximum of 12-14 days.
  2. If possible, place the tree in a garage, carport or sheltered area to help acclimate it to a warmer location before putting it into the house. Keep the root ball moist..
  3. Place ice cubes on the soil to keep cool and moist while in the house.
  4. Place the tree away from heating vents, wood stoves and baseboard heaters.
  5. Check water level daily and refill as needed.
  6. Prepare your planting hole outside by digging it early and covering with plywood until needed. Store soil in the garage so it does not freeze.
  7. If possible, acclimate the tree once more by putting it in a garage or sheltered area for a few days before planting outside. Continue to keep the root ball moist.
  8. Plant the tree as you normally would, mulch and water well.

Growing Tips 

  • Plants require full sun, good air circulation and moist, well-drained, acidic soil.
  • Spruces are shallow-rooted and should always be planted high rather than low.
  • Mulch the root zone with a thick layer to keep plant roots cool and moist.
  • Consider available space and ultimate size of the chosen variety before planting.

 Since we are interfering with the natural growth cycle of these trees, their survival through the season cannot be guaranteed. However, customers who have purchased living trees from us and followed the guidelines have reported a great success rate with the trees thriving in the spring. It is fun to look out into your yard at trees from Christmases past!

Fairy Garden Magic

Do you think your tiny balcony terrace means you can’t have a grand garden? Are you looking for a clever and imaginative way to introduce a child to the world of plants? Have you ever dreamed of your own “McGregor’s Garden?” One of the newest gardening trends can do all these and a whole lot more!

Start planning…and playing…in your fairy garden!

About Fairy Gardens

One of the newest gardening trends, fairy gardening is the new-and-improved miniature gardening of yesteryear with all sorts of new products, idea books and plants. Despite their small size, the themes, designs and creativity of these tiny garden spaces is boundless. Any container, nearly any type of plant and any type of design can add a bit of garden magic even to a tiny space. Go small and have fun.

Designing a Fairy Garden

You can create your fairy garden just about anywhere. For portability, consider a pot, basin or terrarium. Or, for a more rustic appeal, plant an old lunchbox, garden bucket or child’s wagon. Old shoes, a stack of broken pots, a rusty wheelbarrow or a concrete bird bath are other great planting options.

Fairy gardens can be positioned anywhere. A smaller design can be a fun centerpiece to patio furniture, or it can be part of an entryway display. To heighten the intrigue, find a secret place in your own garden to lure the garden fairies. Between tree roots, beside a water feature or in a grove under flowering shrubs… The possibilities are endless.

Design the overall look of your fairy garden just as you would a larger garden. What is its theme? Is it a fantasyland for unicorns? A gnome family farm? A replica of your own big house? It can be anything you imagine. Consider tiers, layers and depth as well to create a truly impactful scene in your miniature fairy world.

If you’re having trouble coming up with an idea, visit your garden center to check out all the products. They’ll help you create your own mini-fantasy scene. From arbors and benches to umbrellas and miniature tools, the possibilities are amazing. If you’re not sure your resident garden fairies will understand your invitation, you can always buy a mannequin fairy to entice them to share the fun.

This visit also sets the mind whirling with ideas for plant materials. Consider the mixture of colors, textures, shapes, and scents… in miniature. Tiny groundcovers such as moss or creeping thyme create beautiful “lawns.” Pebbles become paths. Sand creates shores. Twigs make houses, fences and other structures. What can you do with a small pinecone or acorn? How can you recreate a Disney-type pumpkin carriage?

Creativity knows no limits, and the fairies will love you for it!

gomegarden_250x250 minigarden_250x250